Doing The Swap
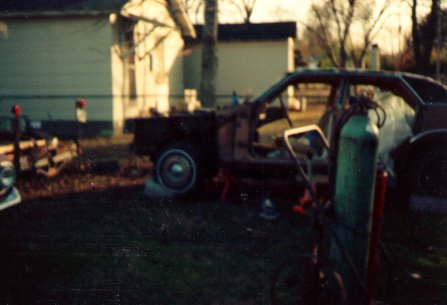
Blurry shot of the donor Maverick. I got tired of trying to fight the exhaust
manifold and motor mount bolts, so I torched the whole front clip off at the
firewall and rolled it into the shop so I could cut the engine out at my
leisure. Odometer read 145,000 miles since 1974.
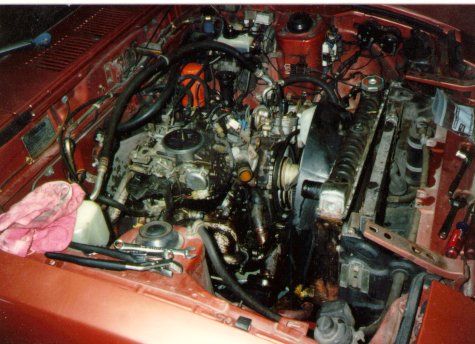
Pulling the rotary out. Notice the engine compartment is full, end to end,
side to side, top to bottom. The 12A is also pretty damned heavy, too. The
front end height was still within factory specs with the V8!
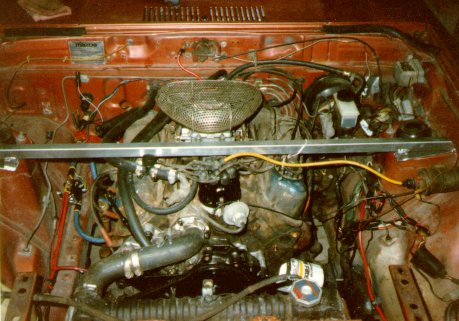
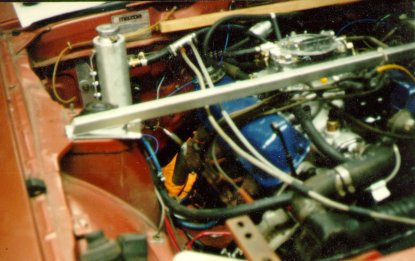
Here's the 2bbl 302 out of the Maverick, with its C4 automatic, in place in
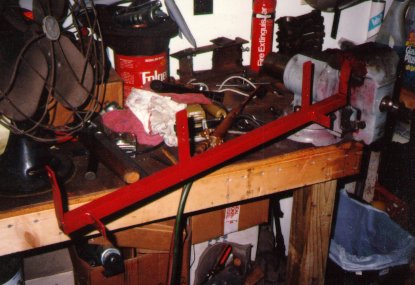
the chassis. Note how much smaller the V8 is than the rotary. I built the
strut tower brace too. Take a look at the blue wires and relay on the left
fenderwell; that's 4-0 battery cable running to the battery, which is just
behind the passenger seat. The smaller cable is the 2-0 ground connection
from the starter directly to the battery. You can change the starter from the
top if you want to.
Another view. I had to modify the crossmember, which swung forward to clear
the rear sump pan of the rotary. I just unbolted the crossmember from the
car, bolted it to a 2x6, sawed out the offending piece and welded in some
tubing. It was my first real welding job.
Small crossmember to go ahead of radiator, bolts to bumper brackets and holds
the original Mazda oil cooler (about two feet wide, 5 inches tall, 2 inches
thick) and an automatic transmission oil cooler.
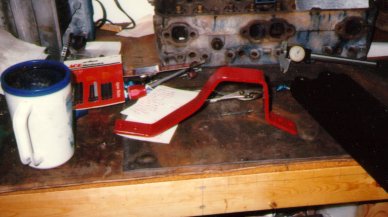
Transmission crossmember. The chassis mounts are higher on one side than the
other, plus inclined in different directions. 3/8 x 2 flat stock took lots of
heat and a big hammer to form

The C4s come in floor or column shift models. I, naturally, had the column
shift type. Rather than disassembling the trans to convert it over, I made
a nylon bushing and bellcrank setup that pivots on the shift arm. It works
fine with the Pinto floor shifter. Adjustment holes were because I was too
lazy to crawl back under the car to measure the throws of the shfiter and
trans linkages.
I used the single exhaust off the Maverick. The Y-pipe cleared the RX
undercarriage perfectly. Notice how it clears the trans tunnel. I welded the
O2 sensor bung in so I could use my Cyberdyne AFR meter. I should have angled
the bung a different direction, but it doesn't hit anything the way it is.
The 2" Maverick Y-pipe mated up to the (metric!) Mazda exhaust with a
connector and a couple of clamps. The car is quiet; you really can't tell
it's not a rotary.
Another view of the exhaust. The driver's side fit just as good. You can see
the battery cables and starter relay too. What looks like a small silver stem
off the strut tower brace is actually a 3/4" steel tubing brace that runs from
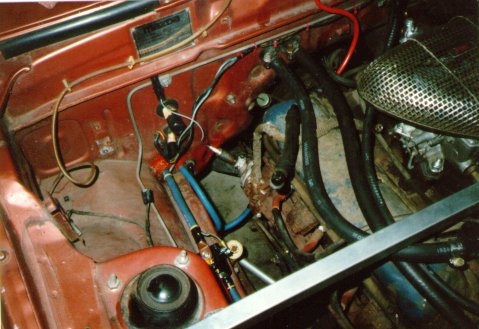
a motor mount bolt to an idler arm bolt, to triangulate the motor mounts.
There are also triangulating braces from the crossmember to threaded pads
welded to the unibody, but you can't see them in this shot.
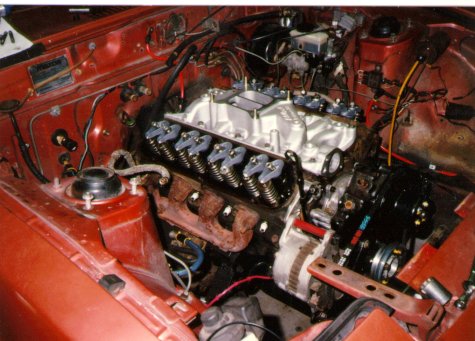
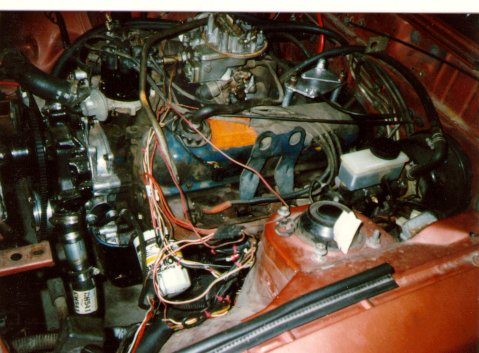
The pushrods were stopped up completely and had to be replaced with new ones
because the tips were worn. The rockers were also badly worn on the tips and
pivot balls. At the time I couldn't find any good used ones, so I carefully
re-radiused the tips with a narrow grinding wheel, sandblasted them, and
coated them with Tech Line's moly antifriction stuff. It seems to have worked
okay. I also put in new valve stem steals and cleaned up the valve springs,
which were crusty. The iron intake and Autolite also got the heave-ho for a
new Edelbrock Performer 289 and a 625 AFB. Down at the bottom you can see the
small diameter crank pulley that I whittled out of a block of aluminum with
the lathe.
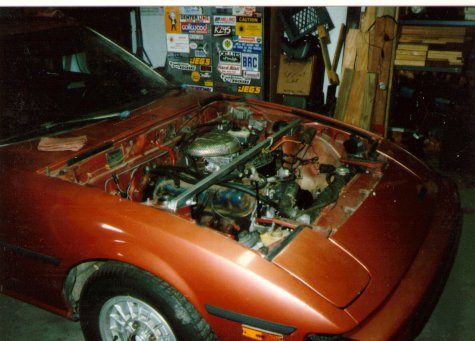
Here we are, done at last. V8 looks small in there, doesn't it? Moments
before first test drive.
Return to top of Tyrannosaurus RX