Ron Melson's 4.6 Windsor Destroker
This page: www.bacomatic.org/~dw/281/281.htm
Main page: http://www.bacomatic.org/~dw/index.htm
Last Updated: 29 Jun 2005
Sometimes projects are carefully planned to meet specific criteria. Sometimes
they're the result of "hey, we could do that..."
This whole project started as a thought exercise - how long of a
connecting rod can we cram into a 5.0? Things started to snowball from there.
There are kits for 5.305" and 5.4" rods. You can use 5.56" 400 Chevy rods
- the 302 I built for TRX does that. Or you can stuff in even longer rods,
but you need either custom pistons or you have to shorten the stroke.
Custom pistons were outside the budget. That meant off-the-shelf bits. By
destroking a 289 crank it was possible to use common Chevy stroker pistons to
stick a 5.7" rod in a 5.0, which has an 8.206" deck height. This gave 281
cubic inches - only 8 shy of a standard 289 - and coincidentally the same as
Ford's overhead cam Modular V8.
4.6 liters became a magic number. A destroked Windsor would have a bigger
bore, shorter stroke, and bigger valves than a Modular 4.6. It's also lighter
and *much* smaller. Could we build an engine that would outpower the new
Modular, be at least as economical on gas, *and* meet current smog specs?
Well, hell, it was worth a shot... and the
fangle factor was outasight.
The engine isn't finished yet, but it's getting there. The basics are the
destroked and lightened rotating assembly, pocket ported closed chamber 289
heads, SVO long tube headers, and a sheet aluminum intake manifold with eight
52mm throttle bodies and a GM 7730 engine management system.
I'll update the page as things progress... there's really been quite a
bit of work on the engine, but not a lot in the way of pictures.
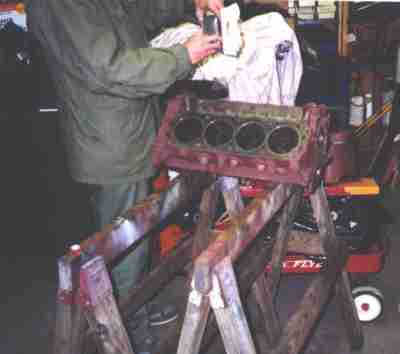 The block has been cleaned, bored, honed, cleaned, and painted with Rust-
Oleum Rusty Metal Primer. Here Ron is scrubbing the bores out with Marvel
Mystery Oil. Even after the block has been washed, you can lift an amazing
amount of swarf out of the crosshatch in the bores by floating it out with oil
- enough to turn a white paper towel silver! This is one of those steps lots
of people skip because it's a pain in the ass.
The block has been cleaned, bored, honed, cleaned, and painted with Rust-
Oleum Rusty Metal Primer. Here Ron is scrubbing the bores out with Marvel
Mystery Oil. Even after the block has been washed, you can lift an amazing
amount of swarf out of the crosshatch in the bores by floating it out with oil
- enough to turn a white paper towel silver! This is one of those steps lots
of people skip because it's a pain in the ass.
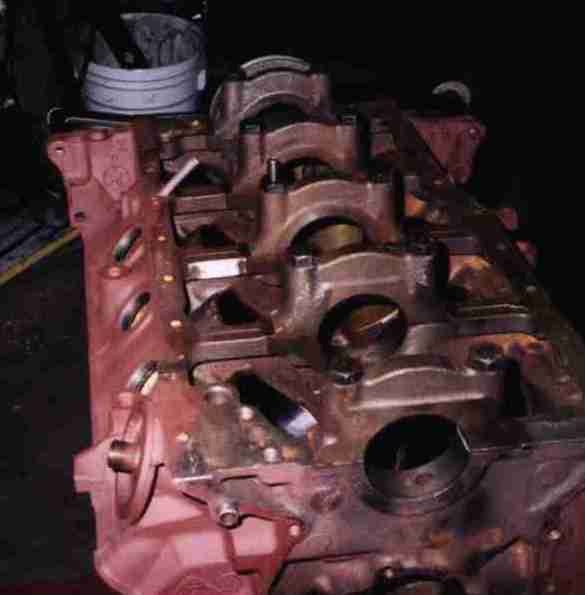
Clean block, ready to paint.
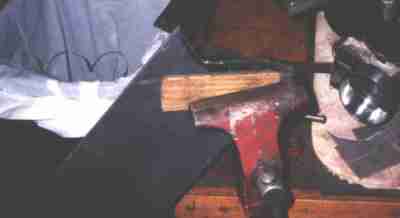
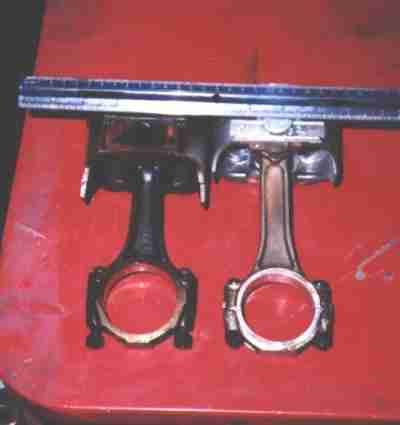 Here's the object of all the gimmickery - the 302 rod on the left is 5.09"
long. The 283 Chevy rod on the right is 5.7" long. The Ford piston has a
1.64" pin height; the Keith Black stroker piston on the right has a 1.15" pin
height. The rest of the room for the longer rod has to come by reducing the
stroke... and for every .10" you reduce the stroke, you only reduce the stack
height by .05". Fortunately things were close enough to make it work by
going from a 3.00" stroke 302 crank to a 2.87" stroke 289 crank, then offset
grinding it down to 2.75" while reducing it from the 289's 2.123" bearing size
to the Chevy's 2.00" bearings.
Here's the object of all the gimmickery - the 302 rod on the left is 5.09"
long. The 283 Chevy rod on the right is 5.7" long. The Ford piston has a
1.64" pin height; the Keith Black stroker piston on the right has a 1.15" pin
height. The rest of the room for the longer rod has to come by reducing the
stroke... and for every .10" you reduce the stroke, you only reduce the stack
height by .05". Fortunately things were close enough to make it work by
going from a 3.00" stroke 302 crank to a 2.87" stroke 289 crank, then offset
grinding it down to 2.75" while reducing it from the 289's 2.123" bearing size
to the Chevy's 2.00" bearings.
 After being destroked to 2.75", the 289 crank had its OD turned down over an
inch, to a bit over 5" OD. The crank balanced out just fine with the light
Chevy rods, Keith Black pistons, thinwall wristpins, stroke change, and
lightened counterweights.
After being destroked to 2.75", the 289 crank had its OD turned down over an
inch, to a bit over 5" OD. The crank balanced out just fine with the light
Chevy rods, Keith Black pistons, thinwall wristpins, stroke change, and
lightened counterweights.
This is one of the first of many passes on the lathe. Fortunately you can do
something else most of the time it's cutting...
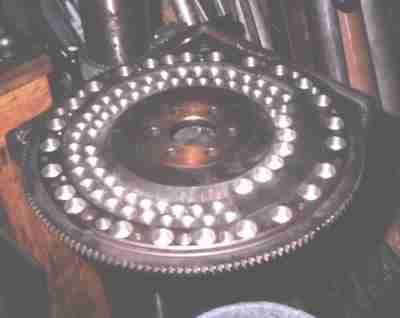 A shot of the flywheel. This started as a 50oz imbalance 5.0 flywheel
since it needs to mate up to a 5.0's T5 transmission setup. It took some more
drilling (more than you see here) to bring it down from 50oz to the 28oz the
281 is balanced at. Several pounds came off the crank OD; almost a pound came
off the harmonic balancer by going from 50oz to 28oz, and five pounds came off
the flywheel, 20 down to 15 pounds - and most of that was on the OD. Yes,
this will weaken the flywheel somewhat. Yes, he knows it would have been
better to have just written a check for an aluminum flywheel. Yes, he has a
scattershield.
A shot of the flywheel. This started as a 50oz imbalance 5.0 flywheel
since it needs to mate up to a 5.0's T5 transmission setup. It took some more
drilling (more than you see here) to bring it down from 50oz to the 28oz the
281 is balanced at. Several pounds came off the crank OD; almost a pound came
off the harmonic balancer by going from 50oz to 28oz, and five pounds came off
the flywheel, 20 down to 15 pounds - and most of that was on the OD. Yes,
this will weaken the flywheel somewhat. Yes, he knows it would have been
better to have just written a check for an aluminum flywheel. Yes, he has a
scattershield.
 This piece of aluminum is the baseplate for the independent runner EFI intake.
The curved ends were jigsawed out; now they're being shaped with the die
grinder. One of the 52mm Chevy throttle bodies is visible to the right.
This piece of aluminum is the baseplate for the independent runner EFI intake.
The curved ends were jigsawed out; now they're being shaped with the die
grinder. One of the 52mm Chevy throttle bodies is visible to the right.
For some reason it's hard to see the aluminum plate in this shot. It's at a
45 degree angle to the right, clamped in the vise with wooden blocks.
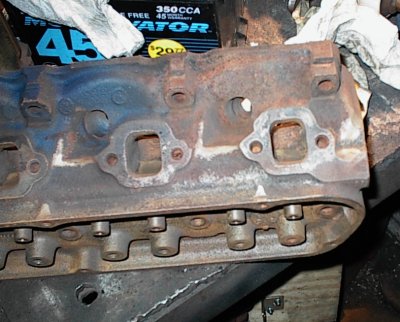
 This is a '66 289 4V closed chamber head. I'm opening up the exhaust ports
here. My local sources had come up empty on good 289 heads; these came from a
helpful Fordnatics subscriber.
This is a '66 289 4V closed chamber head. I'm opening up the exhaust ports
here. My local sources had come up empty on good 289 heads; these came from a
helpful Fordnatics subscriber.
 Sometimes I don't quite get a rod hot enough when heating the pin ends for
press fit pins. The rod will grab the pin before it's quite in position.
Unprintable words. With a lot of lubricant and the press you can scoot the
pin over into position without hurting anything... IF you have a piston that
has adequate support for the pin bosses. Without adequate support, you are
likely to crack the piston.
Sometimes I don't quite get a rod hot enough when heating the pin ends for
press fit pins. The rod will grab the pin before it's quite in position.
Unprintable words. With a lot of lubricant and the press you can scoot the
pin over into position without hurting anything... IF you have a piston that
has adequate support for the pin bosses. Without adequate support, you are
likely to crack the piston.
The Keith Black pistons I used had the pin up in the oil ring, so there was
nowhere to push on that might not break the piston. I machined a chunk of
hard nylon block into a shaped anvil to support the piston. Took several
hours to figure up and machine the block, fifteen seconds to slide the pin
over...

Aluminum plates being milled for the IR intake. After we got these and the
baseplate done, we realized that trying to join aluminum with a MIG welder
sucked. Having had little luck with aluminum brazing rod either, we jumped
track and tried something else.

Cutting off a slab of 5/16" cold-rolled steel flat for the steel intake
manifold. Now we get to machine things all over again...
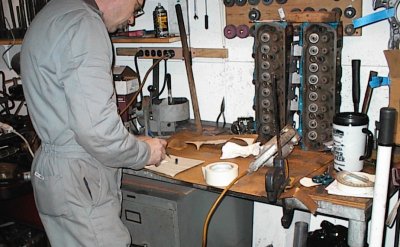
Ron making patterns for the new intake. For ease of fabrication, he decided
to just make little trapezoidal tubes, welded up from four pieces, to go from
square under the throttle bodies to rectangular at the heads. He figured the
transition from round butterfly to square opening wouldn't be any more
traumatic than most normal intake manifolds. I figure he's right.

Wide masking tape over the .040" steel sheet makes it easy to draw on.

Opening the exhaust valves up to 1.50" Chevy size before reworking the
chambers. Next step, the intake seats.
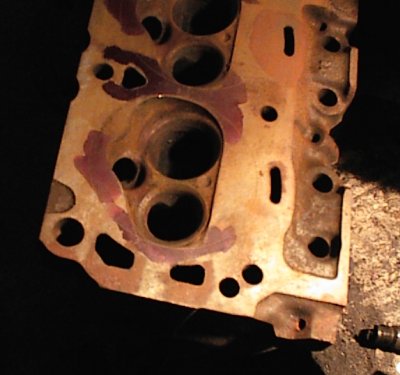
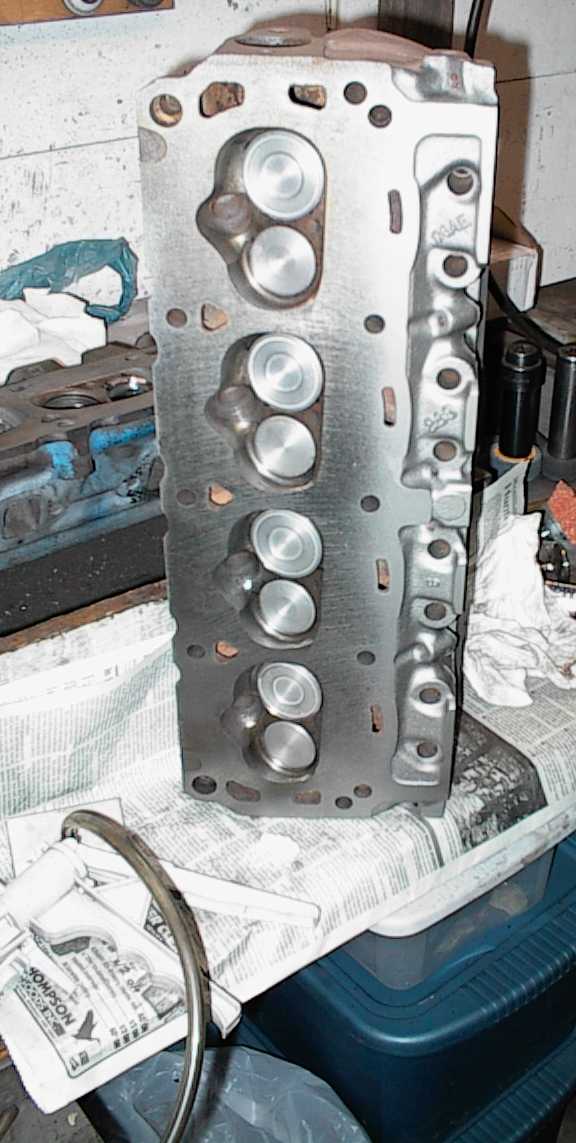
Finished combustion chambers. They've been opened up and polished, but rust
never sleeps... they'll get hit with a Nyalox abrasive cup wheel to shine them
back up before final cutting on the seats and assembly. The Nyalox doesn't
remove enough metal to worry about, just polishes things up.
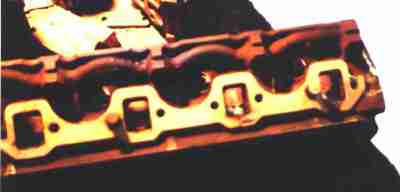
Exhaust porting is done. Anything past this point would be just for show.
Essentially the ports have been gasket-matched, smoothed, guides streamlined,
opened up in the bowl areas and under the seats, and generally neatened up.
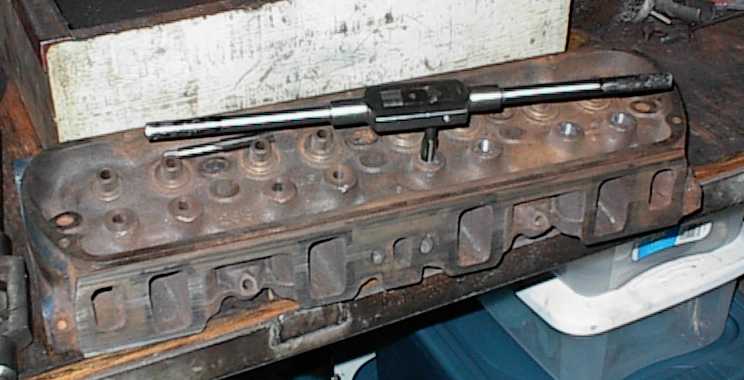
Tapping the heads for screw-in studs. It takes a steady hand to get them in
straight. I use a "through tap" with a long taper to start the threads, then
finish up with a bottoming tap. It wasn't necessary to cut the bosses down
for guide plates since the heads have close-tolerance slots for the pushrods.
They're deeply counterbored from the bottom, so it doesn't look like they're
close tolerance from these pictures.
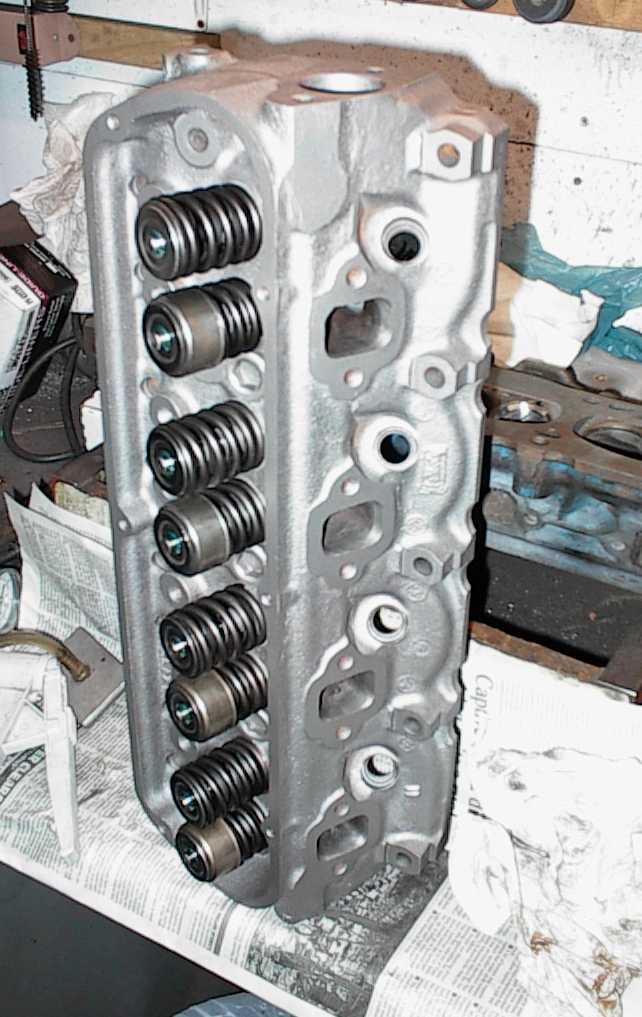
Completed head. Those are new 275# springs, should be more than adequate for
this engine. The retainers are used Pontiac V8 parts. I had purchased chrome
moly Ford retainers, but the spring installed height was too short. The
Pontiac retainers are oddball in that they sit higher on their keepers, and
things worked out okay. I have the Chevy O-ring seals on the Chevy valves,
and I added the Pontiac's steel umbrellas on the exhaust sides. Note they're
a bit deeper than the Chevy parts.
Bottom, with vacuum pump for valve seal check. I ground all the chambers
smooth, though it doesn't look that way from the pictures.
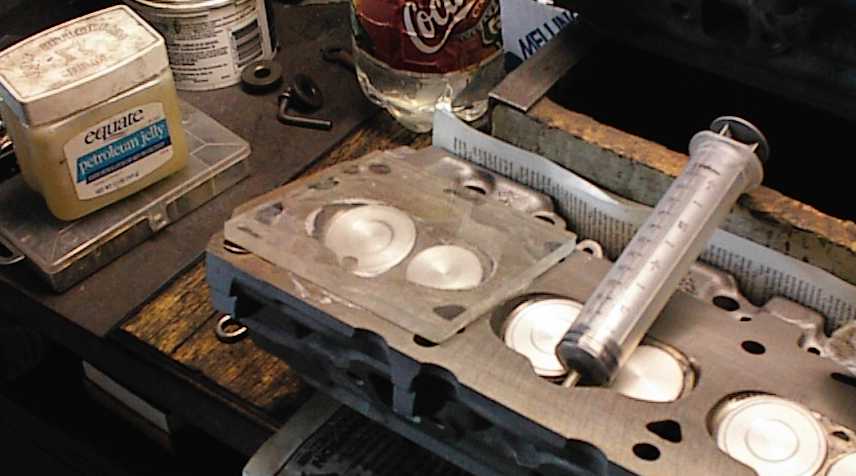
cc'ing the combustion chambers. Some people use wheel bearing grease to seal
the cover; Vaseline wipes up with less fuss.
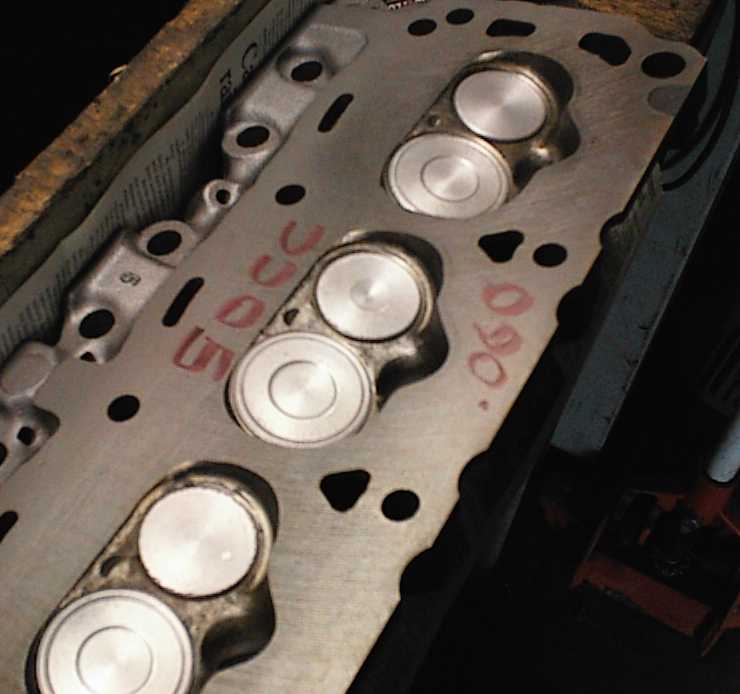
Mill .060" to raise CR, then plunge-cut the valve perimeters to the edges of
the combustion chambers and polish the chambers. I was still able to close it
down to 50cc.
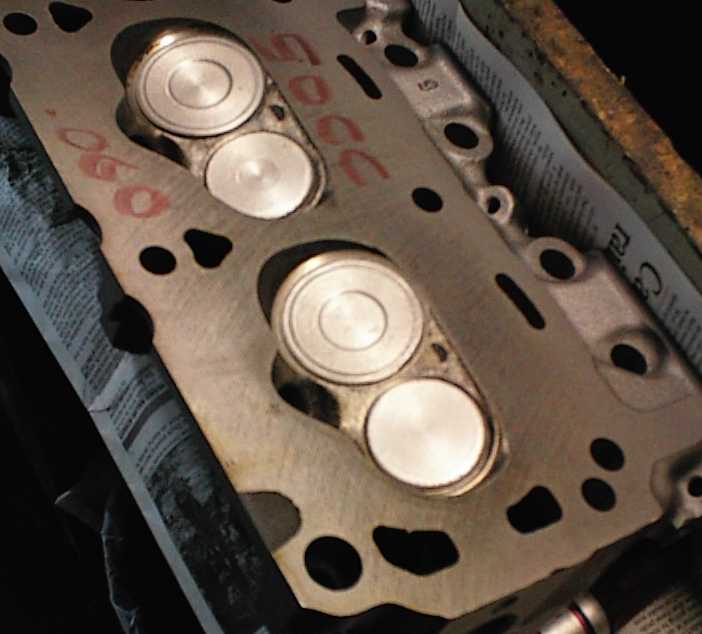
The 1.82" 302 Chevy intake valves have been chamfered and then ditch-cut to
reduce reversion during overlap. The 1.5" exhaust valves have been back-cut
and the faces radiused. They are ceramic coated on both sides.
That's it for now!