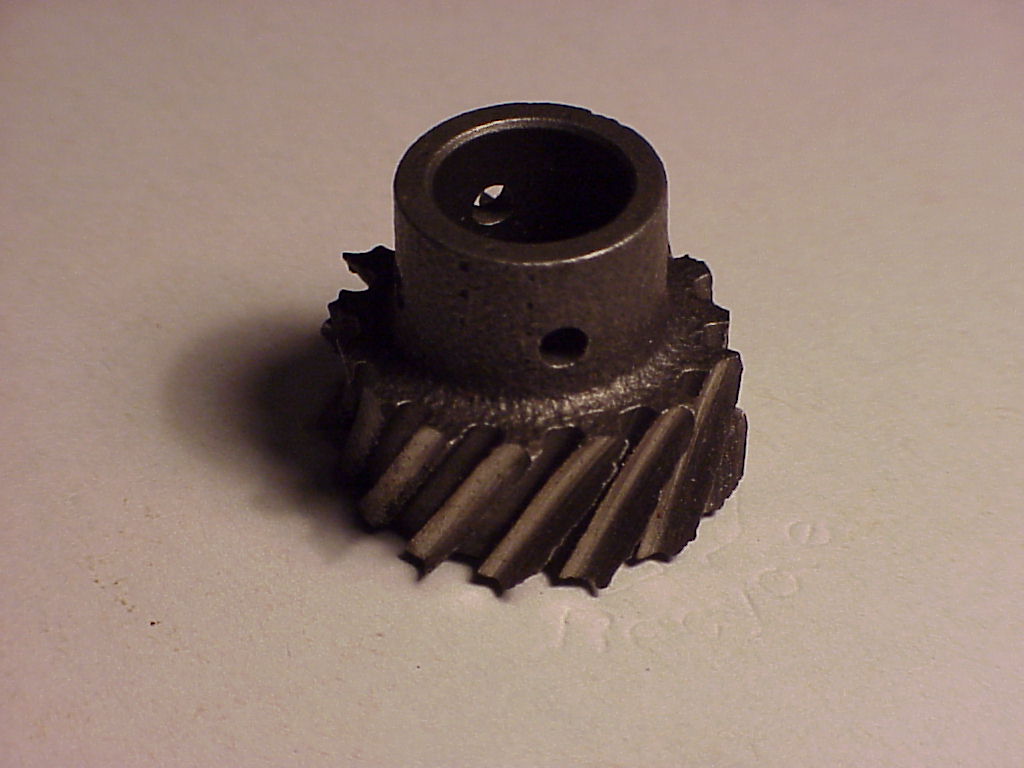
 Photo1
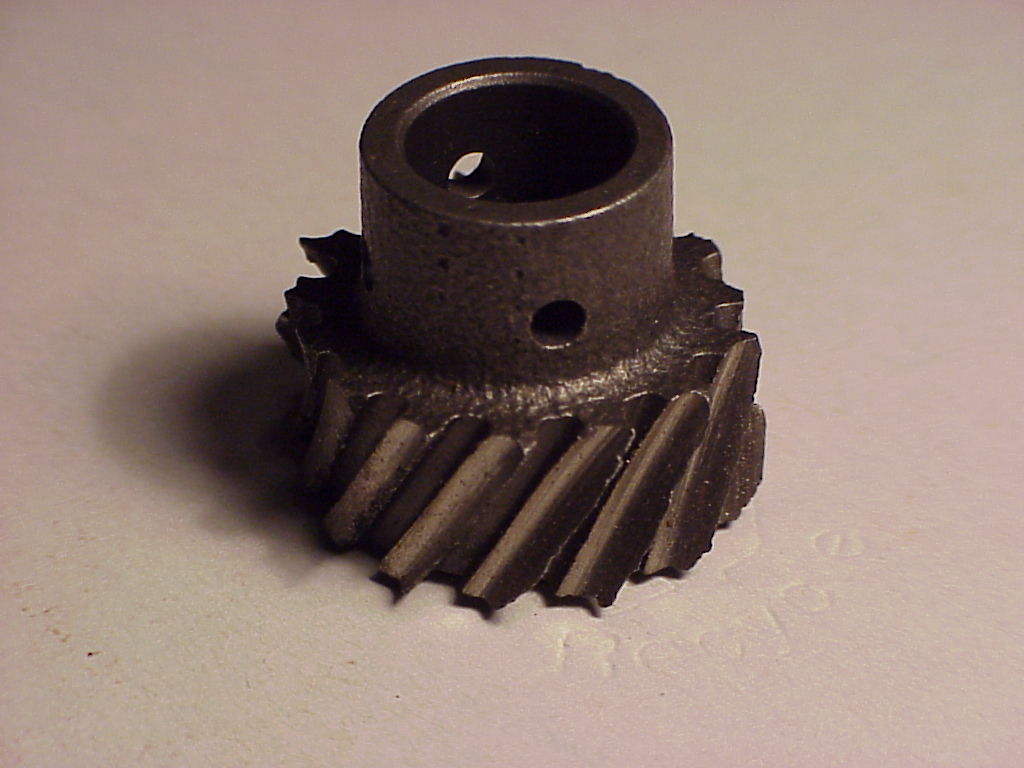 Photo2
I learned much more about distributor gears and camshaft gears than anyone should know a few years back. After I had 500 miles on the engine I rebuilt, I headed to a dragstrip. Unfortunately, I never made it. The car quit on the way there. It was deduced to be a distributor problem after we saw sporadic activity from the rotor and pulled the distributor. The teeth were all chewed up on the distributor gear. We ran to an auto parts store, and got another distributor, turning in the 500 mile old Duraspark distributor as a core. After installation and a quick setting of the timing, I headed back home. I did not get far before the engine quit again. The problem felt similar and yanking the distributor revealed another stripped gear. A photo of this gear can be seen in Photo1 and Photo2.
Photo1
Photo2
At this point I was very frustrated and called the cam tech line for help.
They suggested that a high volume pump can overload a distributor gear and
tear it up. So I removed the oil pan, cleaned out the pan and replaced the
pump and pickup. A new auto parts store gear was put on the distributor and I
then fired up the car and drove it around the block, almost. The gear lasted
about 2 miles before it was all torn up as can be seen in Photo3 and
Photo4.
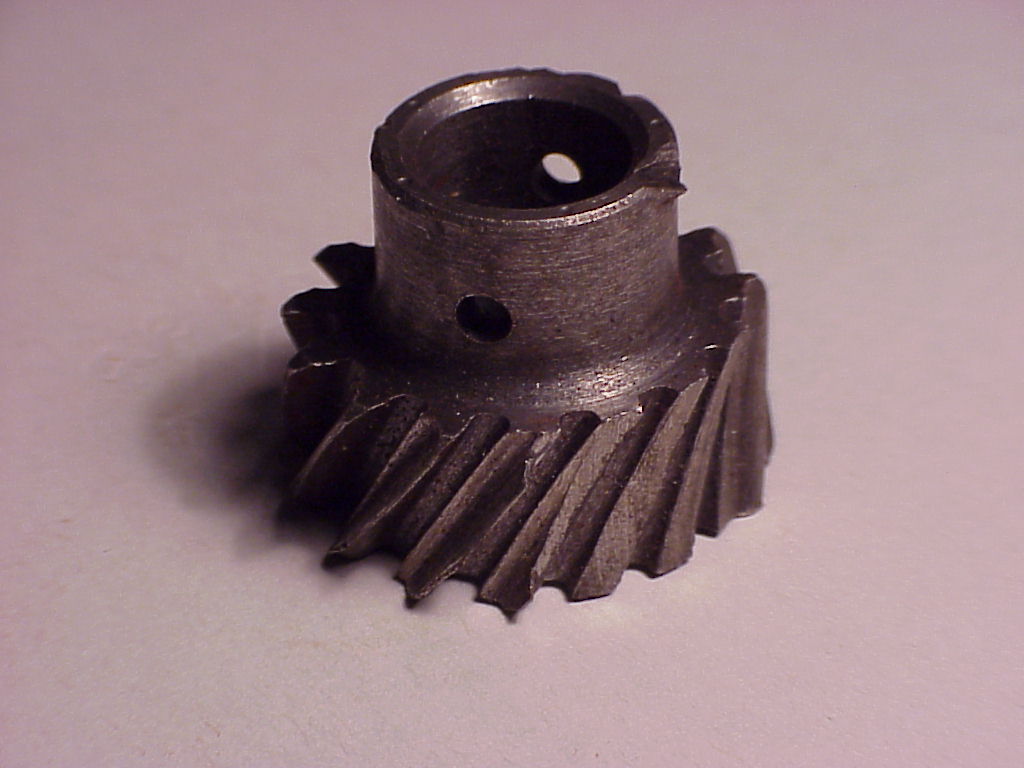 Photo3
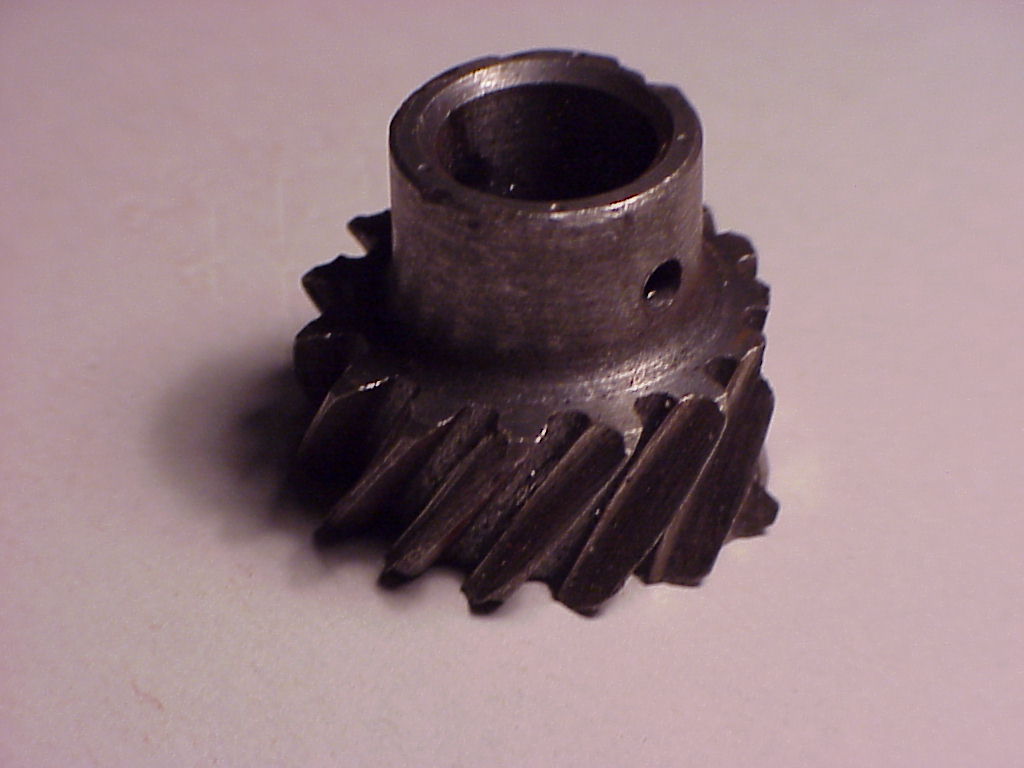 Photo4
Now I'm really confused. The cam vendor wanted the cam back, so I pulled it and sent it back. They sent a new cam and I went through the routine of pulling the pan, pump and pickup, and cleaning them out. I pulled the cam again and sent it back to the grinder, and received a new cam. They also indicated the 302 and 351 timing chain sets are different so I ordered one for a 351W. I also bought a new thrust plate and sanded it on a flat plate of glass to get the minimum acceptable clearance, just in case the cam was walking. And finally, I made the oiling mods that Dave suggested for the block and removed the shroud from the pickup (see below).
After reassembly and pre-oiling, I installed a new auto parts store brand
gear on a third distributor I had, and broke in the cam. After break-in the
distributor was pulled and the gear already showed signs of wear. See
Photo5 and Photo6.
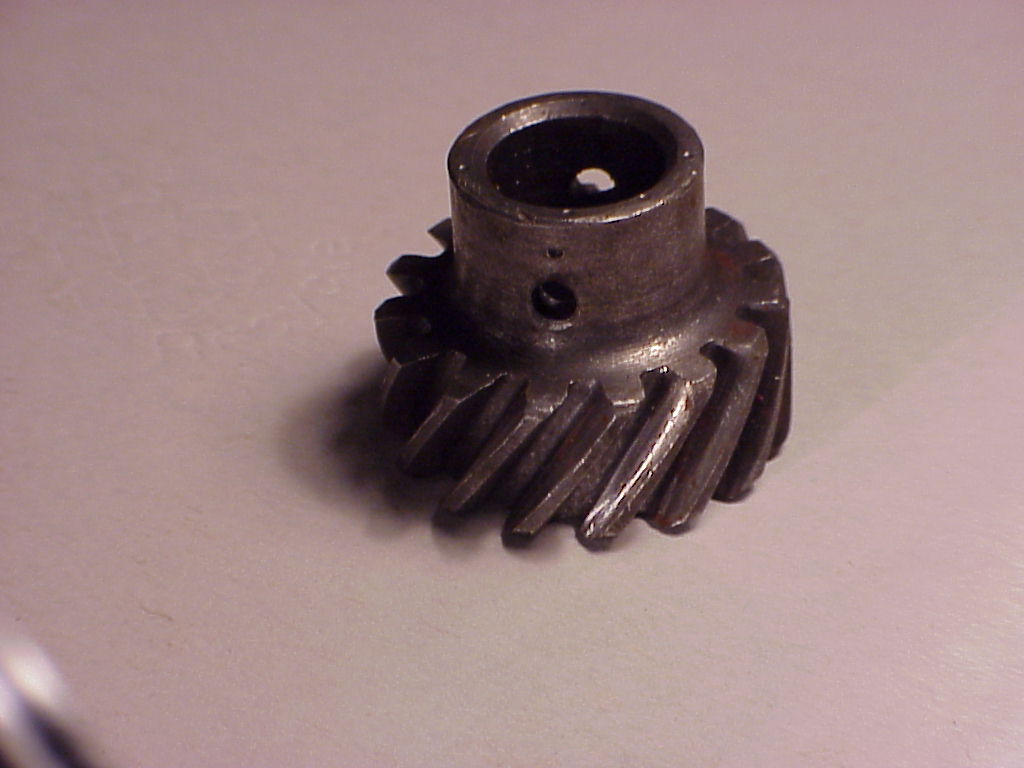 Photo5
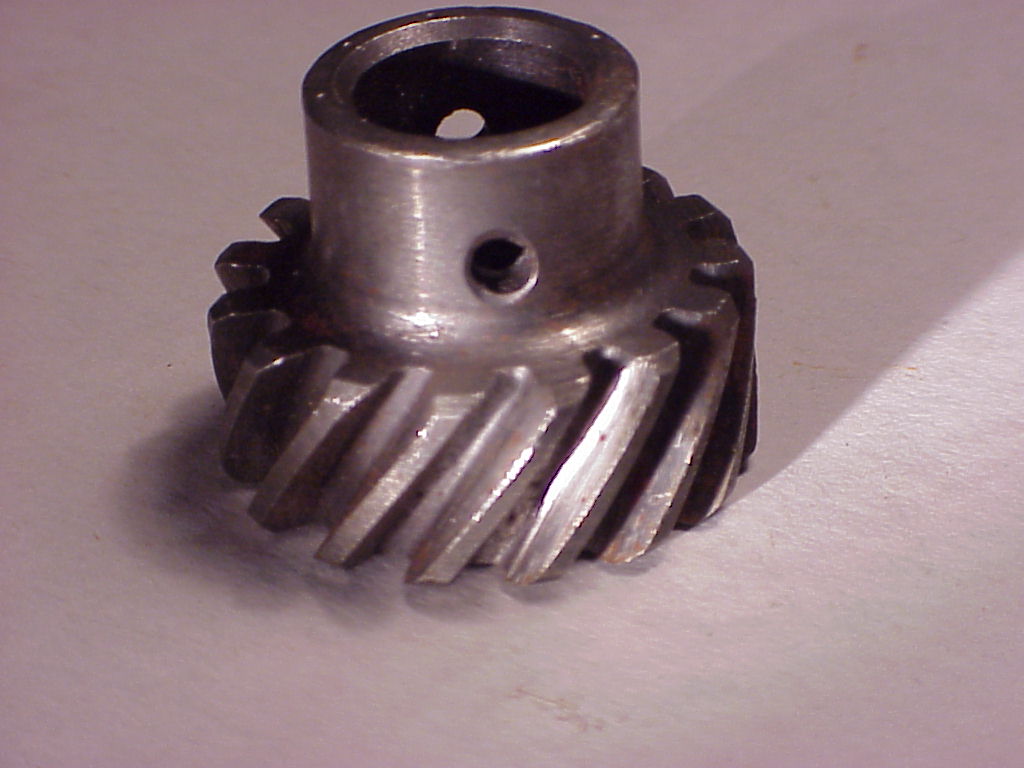 Photo6
At this point I have gone though 4 gears, three distributors, two cams, two oil pumps and pickups, two thrust plates, and two timing chain sets.
The tech line offered to send me a bronze gear to try. I was not fond of using a bronze gear as it seemed like a band aid fix to a deeper problem. However, I told them to send it anyway.
In the meantime, we started comparing the old camshafts to the new one. Dimensions for gear location and size were checked. Measuring the camshaft gear itself, we found the teeth to be thicker on one end of the gear than the other. The average was about .015" thicker on one end than the other. Talking to the tech line, it turns out the cam vender had a bad batch of cores with the gears not fully machined. They do not check every core, only a statistical sampling.
We also checked out the distributor gears themselves. It was hard to check dimensions on torn up units, but what we could check matched up. However, they were considerably different when it came to hardness. On the Rockwell B scale it was something like 70 for the auto parts store gear, 90 for the bronze gear, and 102 or so for the cast iron ford gear. No wonder the auto parts store gear tore up.
After further discussions with the tech line, they wanted this cam back and
sent me another cam with the "NASCAR" treatment" (filed, wire brushed on a
wire wheel, and bead blasted). I installed a fourth distributor with a ford
gear I got from the dealer and painted with machinists blue. After cam break
in I removed the distributor and looked at the gear. Much better. Not every
tooth had a perfect pattern like in Photo7 but all in all it was OK.
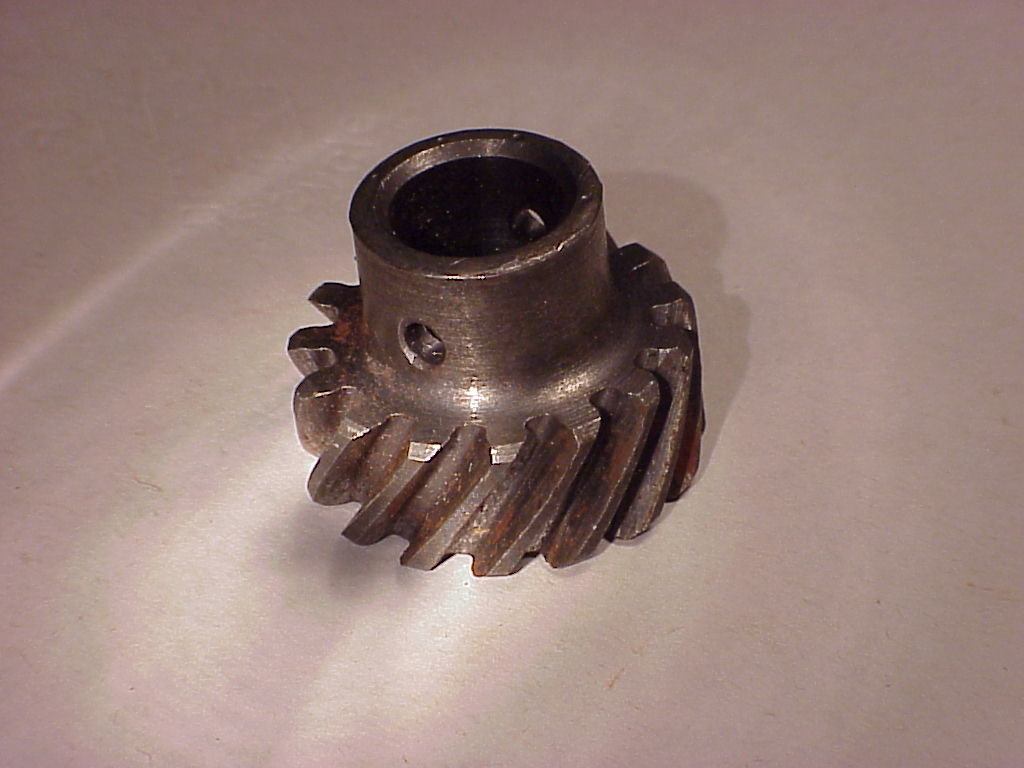 Photo7
I checked the gear every 100 miles or so for the next 2,000 miles and the pattern looked the same with no big signs of wear, so now I just check every 1,000 miles or so. Now that the car runs right, I have found it has enough power to scuff other parts (grin).
Replacement distributor gears typically only have one roll pin hole in them. This is an arbitrary hole and if used to line up with the existing hole, it will give incorrect gear installed height.The proper gear height is 4.031"-4.038" below the block contacting surface on the distributor housing. This is kinda important and I used a washer held in place with a fuel hose below the gear. I could then measure with a dial caliper.
You should only use two gears per distributor. The stock one and the replacement. The proper procedure is to plug the first hole with a solid rod and install the next distributor gear so the roll pin hole is at right angles to the first hole. The reason I went through so many distributors is that all had at least one roll pin hole drilled in the shaft already. After two holes, you should start over. Old motors typically have original distributors with one roll pin hole, but sometimes the remanufactured units have new shafts with one hole.
If the gear is tight enough, it can be run without a pin for test purposes only of course. Been there, done that, don't ask. (grin)
Stabbing a distributor in is either a piece of cake or a pain in the ass. Having a spare distributor shaft handy helps. The problem is the oil pump shaft falls over slightly and it is hard to get it to stand up straight. Packing things with a little wheel bearing grease helps as does coating the distributor gear with wheel bearing grease.
The Ford shop manuals for the car were very valuable when it came to the proper procedure for gear replacement.
Electric drills can burnout really quick when trying to pre-oil an engine. I switched to a 1/2" air drill after toasting a pair of 3/8" electric drills.
The first one is easy. The drivers side lifter gallery plug is located right above and behind the distributor gear. It is usually a cup plug, but sometimes it is a screw in plug. The mod is drilling a .040" hole in that plug. Ideally you should pull the plug and drill it, since you can't clean the oil gallery behind it effectively. However, I left mine in and coated the bit with grease and went slow. I also put the shop vac on the end lifter bore to suck up any chips. It should now spray oil in and around the timing chain gear and the distributor gear. It also will bleed any air out of the lifter gallery on that side. Dunno how much of a long term help that is. My oil pressure is also a little lower than I�d like, 25-30psi hot idle and 55-60 at speed.
The second mod is more difficult, and you�ll need a few special tools like long drill bits or extensions, long center punch, and a small cordless drill. Buy the good high speed steel drill bits, especially for the wire bits; they're not as likely to break. You'll need a drill holder for the little drill. They have various names, but they're basically a little 4" or so collet end extension that goes into your big drill to hold the little drill.
The lower shaft of the distributor has an oil gallery leading to it. Sometimes this gallery is plugged, other times it is blocked by the cam retaining plate.
If it is open, stick a pipe cleaner or wire through so you can sight down the distributor hole and see where to punch. If yours is plugged you'll have to SWAG it. Try to keep centered on the gallery to help prevent breaking bits.
Now look down the distributor hole. There may be a shiny area where the bottom of the distributor rubs the block. Come forward beyond that so the hole will be under the teeth. Make sure you're lined up on the gallery and center punch the bitch out of the block.
You can now start drilling the block with a long aircraft drill bit or an extension on a standard bit. I believe a .125" or .187" hole is recommended. DO NOT drill all the way though, stop before you get though. Then use a .040" or .060" drill to complete the hole into the gallery. Since the gallery dead-ends against the shaft you get almost full pressure at the hole. Ideally you should countersink the top of the big hole slightly to remove any burrs; in practice the gear swings over the surface by .030" or so, and iron doesn't burr significantly anyway.
A few notes about this mod. Drilling the big hole and then the small hole can be tricky. A battery powered drill on its slowest setting is good. A hand drill would be perfect. You can feel the big bit as it starts to break through. Stop. Chuck up the small drill bit however you can, extension, collet, etc. Now drill and observe the runout. By the time you get the chuck, the extension, and the drill out there you'll be lucky if it's not wagging around an inch or so. That wagging will be trying to break the bit, so you need to hold the drill loosely to allow it to move when the bit can't. Reach down there and start drilling. The little drills remove little metal, so not much will appear to happen. Drill 10-15 seconds, stop, and blow the hole out with a soda straw or turkey baster. Drill again, etc. *Carefully* break through.