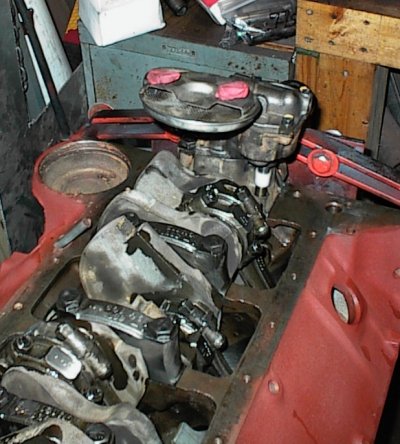
With the new 311 thumpity motor in place, we decided to rebuild the 283. It had been overhauled at some point in its life, rings-bearings-gaskets and a valve job. The heads were in lousy shape when I pulled them apart, but all the internal stuff was fine, so this was basically another rering and valve job. The cylinder bores and crank were well within the service limits.
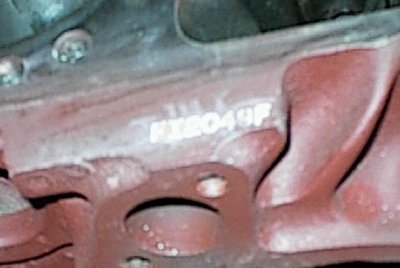 Block numbers, showing it's the original motor for Tommy's 1965 Impala SS.
Yep, a two-barrel 283. The engines were all separate options from the Impala
and SS packages.
Block numbers, showing it's the original motor for Tommy's 1965 Impala SS.
Yep, a two-barrel 283. The engines were all separate options from the Impala
and SS packages.
 283 parts! Tommy cleaned up some of the bits at his place, which are in the
coffee cans and toolbox. Gaskets, rings, bearings, etc. are floating around
back there somewhere...
283 parts! Tommy cleaned up some of the bits at his place, which are in the
coffee cans and toolbox. Gaskets, rings, bearings, etc. are floating around
back there somewhere...
 The engine was disassembled, hot tanked, washed, put back on the stand, and
primed with Rust-Oleum Rusty Metal Primer. I've just popped the new main
bearings in place. The long slotted holes are different than the original
bearings; that's because the 2.5 four uses the same main bearing size as the
small journal V8s, so Clevite made a "common" oil hole slot so replacement
bearings could be used in either engine.
The engine was disassembled, hot tanked, washed, put back on the stand, and
primed with Rust-Oleum Rusty Metal Primer. I've just popped the new main
bearings in place. The long slotted holes are different than the original
bearings; that's because the 2.5 four uses the same main bearing size as the
small journal V8s, so Clevite made a "common" oil hole slot so replacement
bearings could be used in either engine.
 New Fel-Pro rear main seal. GM recommends the seal be offset from the main
cap parting line.
New Fel-Pro rear main seal. GM recommends the seal be offset from the main
cap parting line.
 The crank had a small groove worn in the seal area, but it was okay. You can
barely see it in this picture. There are offset seals available from the
aftermarket for severely worn cranks.
The crank had a small groove worn in the seal area, but it was okay. You can
barely see it in this picture. There are offset seals available from the
aftermarket for severely worn cranks.
 GM RTV sealant at the parting line. This stuff costs about $10 per tube, but
it's almost worth it. I use it for places like this, that absolutely,
positively must not leak.
GM RTV sealant at the parting line. This stuff costs about $10 per tube, but
it's almost worth it. I use it for places like this, that absolutely,
positively must not leak.
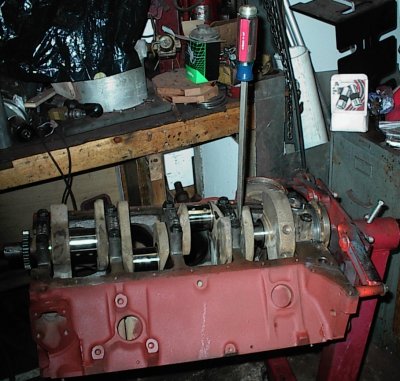 The crank got tanked, balanced, and polished. Here, I'm levering it to one
side to check the end play. It was okay.
The crank got tanked, balanced, and polished. Here, I'm levering it to one
side to check the end play. It was okay.
 Chevrolet cam bearings have three different inside diameters. Large, medium,
small. For whatever weird bowtie reason, they don't go L-M-M-S-S like you'd
expect. Oh, noooo... they go L-M-S-S-M. After you have that particular
"learning experience" you remember it for life...
Chevrolet cam bearings have three different inside diameters. Large, medium,
small. For whatever weird bowtie reason, they don't go L-M-M-S-S like you'd
expect. Oh, noooo... they go L-M-S-S-M. After you have that particular
"learning experience" you remember it for life...
 Now we use the fancy cam bearing driver tool...
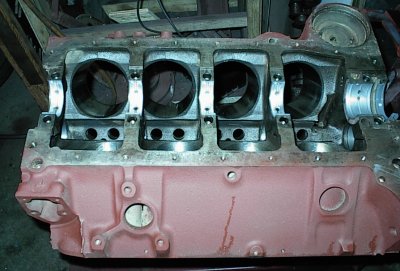
 Installing the pistons. Since they were inside their service limits, I wire
wheeled the carbon off, cleaned them in solvent, and put them back in.
New moly rings have already been gapped and installed.
Installing the pistons. Since they were inside their service limits, I wire
wheeled the carbon off, cleaned them in solvent, and put them back in.
New moly rings have already been gapped and installed.
 The dark spot in the second cylinder from the front is where the hone didn't
touch that part of the bore. It's well within the service limit specified by
GM, but the rigid stones couldn't touch that part of the cylinder. It's
harmless, but it looks funny.
The dark spot in the second cylinder from the front is where the hone didn't
touch that part of the bore. It's well within the service limit specified by
GM, but the rigid stones couldn't touch that part of the cylinder. It's
harmless, but it looks funny.
You can see the new cup plugs in the front of the main and lifter oil
galleries in this shot.
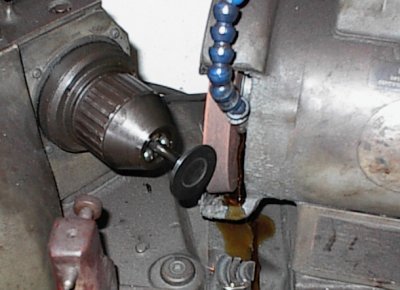
 The engine had a Sealed Power aftermarket oil pump in it. I took it apart and
cleaned it, it was fine. Here, I'm making sure the pickup tube is installed
correctly.
The engine had a Sealed Power aftermarket oil pump in it. I took it apart and
cleaned it, it was fine. Here, I'm making sure the pickup tube is installed
correctly.
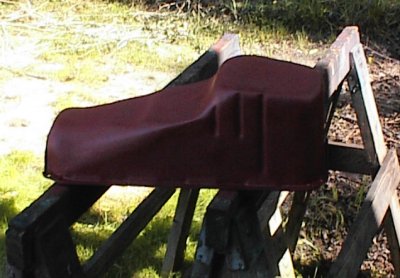 Tanked, cleaned, and primed oil pan, drying in the sun. This is not the
original oil pan; it's for a later model car, but that's what was on the
engine when Tommy pulled it out.
Tanked, cleaned, and primed oil pan, drying in the sun. This is not the
original oil pan; it's for a later model car, but that's what was on the
engine when Tommy pulled it out.
 After applying sealer to everything, we found out the pan didn't want to sit
down on the block correctly. It was not just warped, but it wasn't quite the
right shape around the circular cutout in the back. We used a blunt
screwdriver and a piece of 1/8x1 flat steel as corking tools to reshape the
curve at the back of the pan. The 283 had always had a tiny mystery leak
somewhere at the back; this was it.
After applying sealer to everything, we found out the pan didn't want to sit
down on the block correctly. It was not just warped, but it wasn't quite the
right shape around the circular cutout in the back. We used a blunt
screwdriver and a piece of 1/8x1 flat steel as corking tools to reshape the
curve at the back of the pan. The 283 had always had a tiny mystery leak
somewhere at the back; this was it.
 Finally everything is fitting correctly...
 ...and now it gets painted Chevrolet Orange, correct for a '65 SS.
 Silicone sealer around the holes, then drive the freeze plugs in. Some
builders rant that sealer isn't necessary. Chevy says to use it. I do, and
my plugs don't leak.
Silicone sealer around the holes, then drive the freeze plugs in. Some
builders rant that sealer isn't necessary. Chevy says to use it. I do, and
my plugs don't leak.
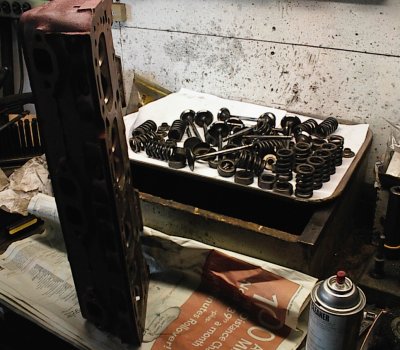
 Cleaned valvetrain bits drying. Solvent and the wire wheel on the bench
grinder do wonders.
Cleaned valvetrain bits drying. Solvent and the wire wheel on the bench
grinder do wonders.
 More chiseling, wire wheeling, and scraping. The heads weren't as carboned up
as some.
More chiseling, wire wheeling, and scraping. The heads weren't as carboned up
as some.
 Here, I've already reamed the heads for thinwall guide liners, hammered the
liners in from the combustion chamber side, and I'm driving the ball broach
through with the hammer. The broach swages the guides tightly into their
holes and establishes their correct inside diameter.
Here, I've already reamed the heads for thinwall guide liners, hammered the
liners in from the combustion chamber side, and I'm driving the ball broach
through with the hammer. The broach swages the guides tightly into their
holes and establishes their correct inside diameter.
 Now I'm cutting off the extra length of guide liner that's sticking out the
tops of the bosses.
Now I'm cutting off the extra length of guide liner that's sticking out the
tops of the bosses.
 And now I'm done with that part, lightly chamfered the guide, and made sure
the valves slide freely.
And now I'm done with that part, lightly chamfered the guide, and made sure
the valves slide freely.
 The stones have to be trued up with this fixture. An industrial diamond cuts
the stones to the right angle, makes them concentric to the holder, and
exposes fresh material to make a clean cut on the seat.
The stones have to be trued up with this fixture. An industrial diamond cuts
the stones to the right angle, makes them concentric to the holder, and
exposes fresh material to make a clean cut on the seat.
 Expanding pilot goes down into the head to guide the stone holders. Felt tip
marks are so I can see where I'm cutting.
Expanding pilot goes down into the head to guide the stone holders. Felt tip
marks are so I can see where I'm cutting.
 Working on an exhaust seat. Spring and washer let me "bounce" the stone
against the seat to clear grit out.
Working on an exhaust seat. Spring and washer let me "bounce" the stone
against the seat to clear grit out.
 Getting ready for the 45 degree final cut.
 Now I've finished up all the seats.
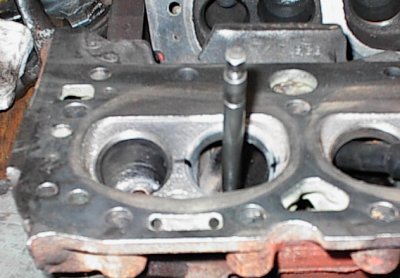
 Squaring up the ends of the valves. They've already been chamfered at the
belt sander. The tips wear and mushroom over time and have to be trued up so
the valve is accurately located in the chuck to grind the faces.
Squaring up the ends of the valves. They've already been chamfered at the
belt sander. The tips wear and mushroom over time and have to be trued up so
the valve is accurately located in the chuck to grind the faces.
 Grinding the valves on the Sioux valve grinding machine. I use 45 degrees on
the seat and 45 degrees on the valve.
Grinding the valves on the Sioux valve grinding machine. I use 45 degrees on
the seat and 45 degrees on the valve.
 Washed and drying. Grinder dust gets everywhere.
 Painted and drying in the sun.
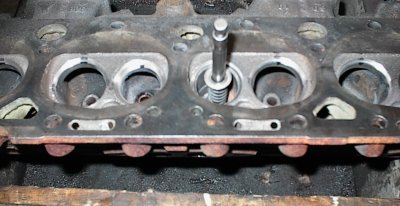
 Cleaned and ready to assemble. Fiberglass trays are handy for parts.
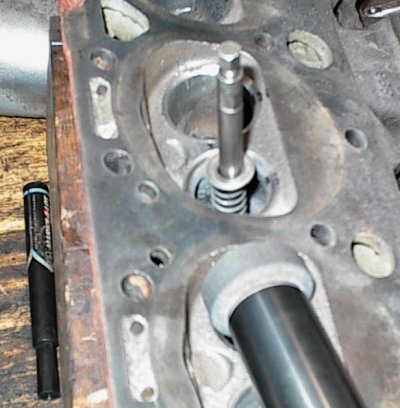
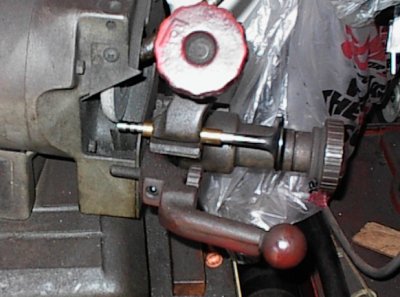
 Valve spring installed height is 1.72". The dial caliper sets the snap gauge.
For a stock type valve job, I shim in .030" increments. Many shops use .060"
increments. .015" shims are special-order racing stuff.
Valve spring installed height is 1.72". The dial caliper sets the snap gauge.
For a stock type valve job, I shim in .030" increments. Many shops use .060"
increments. .015" shims are special-order racing stuff.
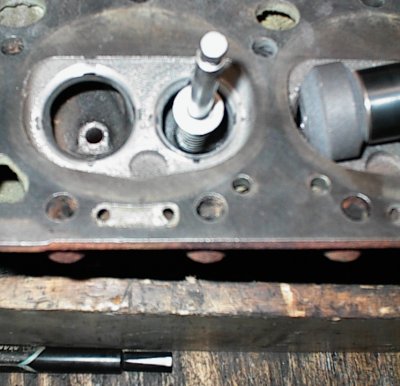
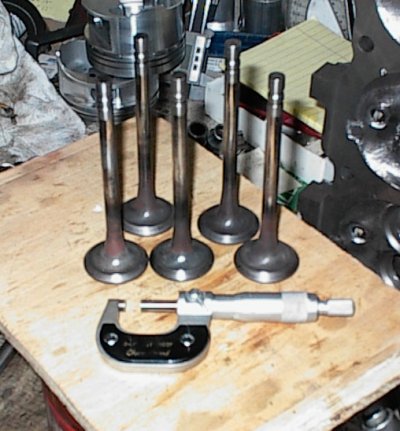 Five exhaust valves had stems worn .002 or more and had to be replaced. Since
there were some odd valves here and there, some of them apparently had been
replaced before.
Five exhaust valves had stems worn .002 or more and had to be replaced. Since
there were some odd valves here and there, some of them apparently had been
replaced before.
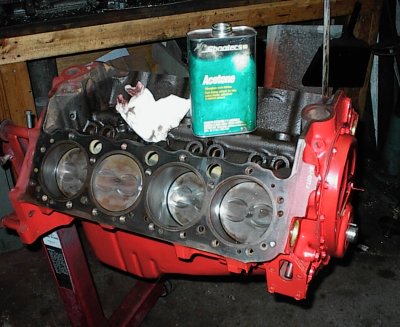 The acetone and paper towels come back out. Gunge on the towel is mostly
orange overspray.
The acetone and paper towels come back out. Gunge on the towel is mostly
orange overspray.
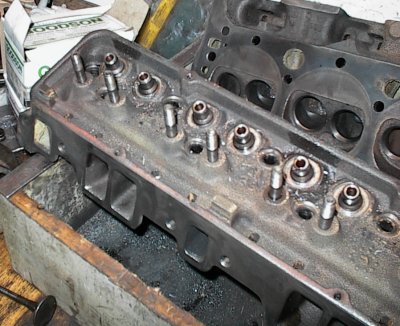
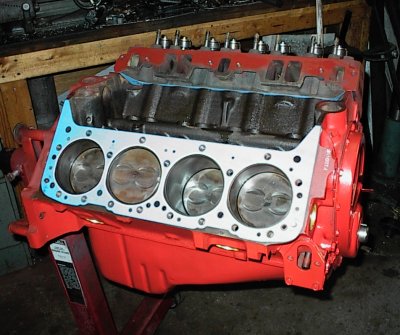 All commercial head gaskets are sized for the 400 with an overbore. These are
Fel-Pros. For a high performance engine we'd use the 283-size steel shims,
still available from GM, but the Fel-Pros will work okay for a stock engine.
All commercial head gaskets are sized for the 400 with an overbore. These are
Fel-Pros. For a high performance engine we'd use the 283-size steel shims,
still available from GM, but the Fel-Pros will work okay for a stock engine.
 All Chevy head bolts go through to water, so they get Teflon dope. Lots of
people get away without putting sealer on the threads, but all that's keeping
water out of the oil is the old sealer still left on the block and threads.
If you thoroughly clean everything, that's not there any more, and it's a bad
risk to take anyway.
All Chevy head bolts go through to water, so they get Teflon dope. Lots of
people get away without putting sealer on the threads, but all that's keeping
water out of the oil is the old sealer still left on the block and threads.
If you thoroughly clean everything, that's not there any more, and it's a bad
risk to take anyway.
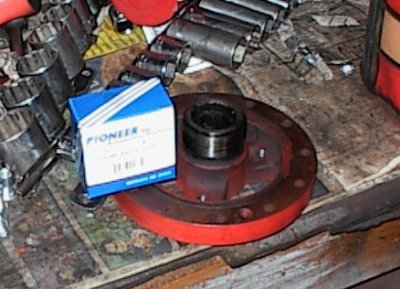 The harmonic balancer had a groove worn in the seal area, so a $5 repair
sleeve went on.
The harmonic balancer had a groove worn in the seal area, so a $5 repair
sleeve went on.
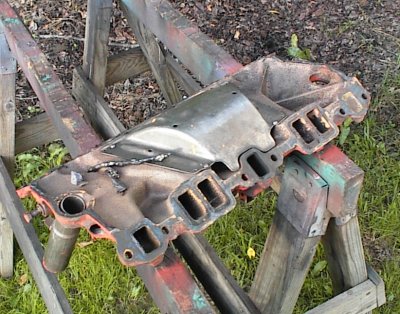 Relatively clean manifold, some gasket material still stuck to it. Normally
you'd break out the razor scraper and have at it.
Relatively clean manifold, some gasket material still stuck to it. Normally
you'd break out the razor scraper and have at it.
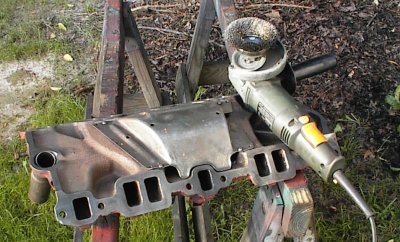 The secret weapon - a cup wheel for the angle grinder. It makes short work of
gasket material and general crud. The wheels don't last all that long, but
they're still worth it for the time they save.
The secret weapon - a cup wheel for the angle grinder. It makes short work of
gasket material and general crud. The wheels don't last all that long, but
they're still worth it for the time they save.
Fifteens seconds of work, and the flange is perfect.
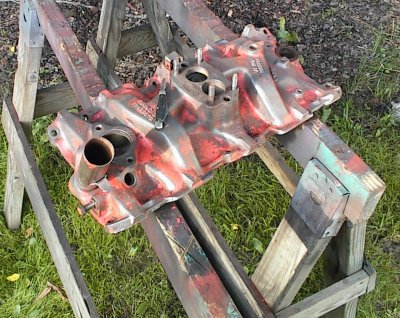 Some more chiseling and a small diameter wire wheel...
 Now some primer so the orange will stick properly.
 The engine was on Tommy's stand, so he rolled it up on the trailer and tied
the stand down. He figured it would be okay for a five mile drive. Me, I'm
more paranoid than that...
The engine was on Tommy's stand, so he rolled it up on the trailer and tied
the stand down. He figured it would be okay for a five mile drive. Me, I'm
more paranoid than that...
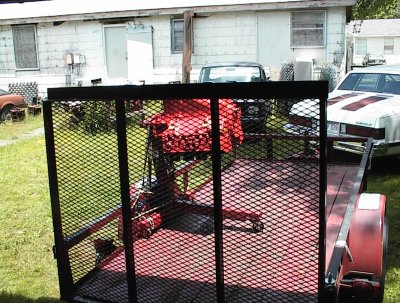 Despite paranoia, he made it home without tipping the stand over. A few hours
later, the 283 was back in the Impala.
Despite paranoia, he made it home without tipping the stand over. A few hours
later, the 283 was back in the Impala.
     M A X I M U M     O V E R D R I V E     R A C I N G     E N G I N E S


                          283 Chevy for Tommy Wilson


                                1965 Impala SS


                     completed 05/31/03  (complete engine)


                              3.875 bore   (std)
                              3.00  stroke (std)


                            283 CID, 4639cc (4.6 L)


     warranty:  if it breaks, you get to keep all the pieces you can find

COMPONENTS ---------------------------------------------------------------

heads:
        Chevrolet 886 closed chamber castings, no bolt holes
        stock 1.72/1.50 valves (5 exhaust valves replaced)
        stock valve springs
        1.70" installed height
        three angle valve job, 30-45-60 degrees
        valve job vacuum checked
        bronze guide liners
        stock O-ring seals and steel umbrellas
        no rotators

block:
        '66 283, standard bore
        cam bearings Dura-Bond CH-8
        brass freeze plugs
        new lower dipstick tube

crank:
        283 3.00" small journal, cast iron
        polished mains and rods
        main journals worn/polished .001
        main bearings MS-429P-1 .001-under
        rod bearings CB-745-P std.

pistons:
        stock Chevy flat top, 4 relief, std.

rings:
        Perfect Circle std. 50076CP moly 283 rings
        gaps .020, .020, .030 all

rods:
        283 small journal forgings

cam:
        Melling stock replacement

timing set:
        Cloyes, stock silent chain

lifters:
        stock hydraulic

oiling:
        Speed-Pro standard volume oil pump
        1966 Chevrolet canister oil filter