Tommy Wilson has a very clean 1965 Impala SS. The original owner had optioned it out with everything except horsepower, apparently being happy with the two barrel 283. The 283 ran darned well, as 283s are prone to do. But after 37 years it had developed a small rear main leak, and if it had to come out, it might as well get a few tweaks.
We wound up scavenging enough parts to build a complete second engine. Since the car isn't a daily driver we were able to go a little more radical than stock.
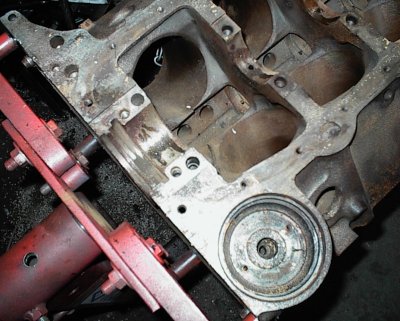 Here's the beginning - a crusty old '66 283 block from the storage shed,
already .030-over. Amazingly enough, this is the first engine I ever built,
back when I was in high school, for my future wife's '66 Chevelle. The engine
outlasted the Chevelle, and then the '73 Mercury Capri we swapped it into
later, and finally got retired and broken down for parts. Though the bores
were stained, were well within tolerance and cleaned up nicely.
Here's the beginning - a crusty old '66 283 block from the storage shed,
already .030-over. Amazingly enough, this is the first engine I ever built,
back when I was in high school, for my future wife's '66 Chevelle. The engine
outlasted the Chevelle, and then the '73 Mercury Capri we swapped it into
later, and finally got retired and broken down for parts. Though the bores
were stained, were well within tolerance and cleaned up nicely.
This shot shows the chalk marks where I decided to clean up some odd casting
imperfections where the cylinder cores had been slightly misaligned during the
manufacturing process.
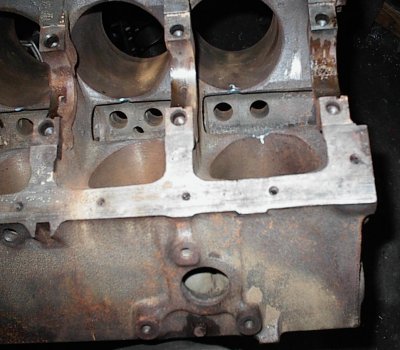 Just a little radiused divot at each place removed a nasty stress riser.
Well, sure, the block made it far enough to need a rebuild without any cracks
propagating, but anal-retentive turd polishing has no sane limits.
Just a little radiused divot at each place removed a nasty stress riser.
Well, sure, the block made it far enough to need a rebuild without any cracks
propagating, but anal-retentive turd polishing has no sane limits.
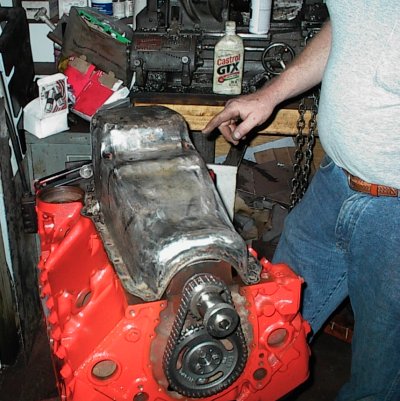
 The star of the show - a forged steel 327 crankshaft, found waaay back in the
crank racks of a friend's shop. It took an hour to shift enough crankshafts
to get to it. Years of Dixie humidity had rusted it up, and the local mud
daubers had moved in. First you hammer the mud out with steel rods, then you
use the gun brushes...
The star of the show - a forged steel 327 crankshaft, found waaay back in the
crank racks of a friend's shop. It took an hour to shift enough crankshafts
to get to it. Years of Dixie humidity had rusted it up, and the local mud
daubers had moved in. First you hammer the mud out with steel rods, then you
use the gun brushes...
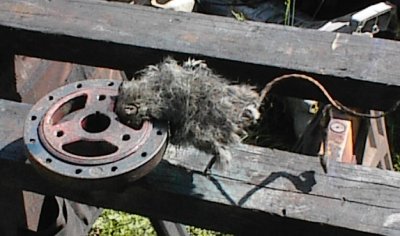 This is the correct harmonic balancer for a 1965 283. The bonded rubber
between the hub and inertia ring was in fine shape. Dead rat added to special
"used part ambiance." After removing the majority of the fossilized rat with
a stick, I ran the balancer through the hot tank. Boiling lye removed the
rest.
This is the correct harmonic balancer for a 1965 283. The bonded rubber
between the hub and inertia ring was in fine shape. Dead rat added to special
"used part ambiance." After removing the majority of the fossilized rat with
a stick, I ran the balancer through the hot tank. Boiling lye removed the
rest.
 Spinning the crank up on the balance machine. All the rods and pistons have
already been weighed and equalized.
Spinning the crank up on the balance machine. All the rods and pistons have
already been weighed and equalized.
 Every blue moon, something like this happens. The machine is at its most
sensitive setting, and the needle is barely off the peg, just barely
registering - about 1/20 of the tolerance for a "well balanced" crank, and
stock Chevy bits are usually not even close.
Every blue moon, something like this happens. The machine is at its most
sensitive setting, and the needle is barely off the peg, just barely
registering - about 1/20 of the tolerance for a "well balanced" crank, and
stock Chevy bits are usually not even close.
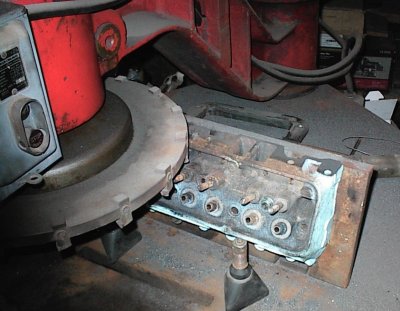
 The cylinder heads were weary "461" closed chamber castings, veterans of at
least one botched valve job, with the usual wear and tear. But they were not
cracked, which is fairly common.
The cylinder heads were weary "461" closed chamber castings, veterans of at
least one botched valve job, with the usual wear and tear. But they were not
cracked, which is fairly common.
The first stage of cylinder head modification involved angle milling the
bejayzus out of them on this machine. In this picture, the decks have already
been cut, and I've reset to do the intake faces. When you angle mill the
heads, the intake manifold mating surface tilts too, which requires a second
operation to correct.
 Here I'm halfway done. There's enough slack in the intake bolt threads for
the bolts to go in okay. This was the first time I'd done anything like this,
so I took a lot of shallow cuts to avoid the "fools rush in" syndrome.
Here I'm halfway done. There's enough slack in the intake bolt threads for
the bolts to go in okay. This was the first time I'd done anything like this,
so I took a lot of shallow cuts to avoid the "fools rush in" syndrome.
 Here we are, all pretty and clean. I had to remove .028" to clean things up.
This will have to be made up for later.
Here we are, all pretty and clean. I had to remove .028" to clean things up.
This will have to be made up for later.
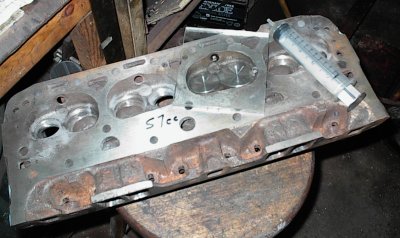 The results of angle milling - chamber size is down to 57cc from 64cc. Valve
inclination is slightly changed too, from 23 to 20 degrees.
The results of angle milling - chamber size is down to 57cc from 64cc. Valve
inclination is slightly changed too, from 23 to 20 degrees.
 Here we are, doing another trial fit. By some minor miracle, the manifold
mating surfaces were dead true, which means not only was my machining
accurate, but the block decks were square and the intake was properly
machined. I tried two different intakes just in case.
Here we are, doing another trial fit. By some minor miracle, the manifold
mating surfaces were dead true, which means not only was my machining
accurate, but the block decks were square and the intake was properly
machined. I tried two different intakes just in case.
The only problem was, the bolts were tight going in, and the intake actually
touched the valley end rails due to the .028" cut, which let the intake drop
more than .028" since the cut is at an angle.
 Here's the cure, more old parts from back in the days before cheap aluminum
aftermarket heads - .030" offset dowels. The intake lined up fine then.
Here's the cure, more old parts from back in the days before cheap aluminum
aftermarket heads - .030" offset dowels. The intake lined up fine then.
At this time I also checked for cylinder bore clearance with the 2.02/1.60
valves. These are much larger in diameter than any factory 283 valve, and the
offset dowels have moved the valves along with the head. The intake valve
touched at .800" lift, the exhaust a bit more. I figured I was safe there.
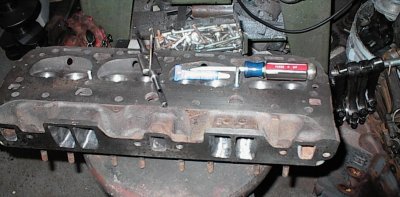
 Five of the studs on one head had been pulled some time before, so I tapped
the holes for repair studs. The Isky cam we were using had moderate spring
pressure requirements, so we saved the money and labor it would have taken to
convert to screw-in studs. John Crowder at Motor Pro got the studs for us.
Five of the studs on one head had been pulled some time before, so I tapped
the holes for repair studs. The Isky cam we were using had moderate spring
pressure requirements, so we saved the money and labor it would have taken to
convert to screw-in studs. John Crowder at Motor Pro got the studs for us.
You can see some of the grinding on the exhaust ports here. I don't have any
pictures of the porting, but there's a *lot* of time in the bowls, the
exhausts were polished, and the intake ports were matched to the manifold, but
otherwise left alone. There's probably 40 hours of grinding there.
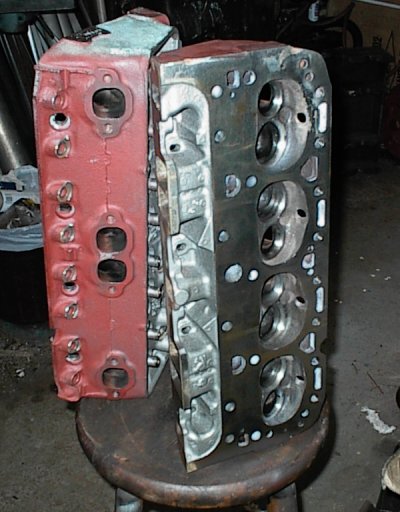
 The two heads were from two different engines. One had apparently been
prepped to go on a small block 400 at some time during the last 35 years.
I was still searching or correct 3-7/8" bore head gaskets. The only ones I
could find were steel shims, which would leak around the 400 steam holes since
they had no raised bosses in that area. I went ahead and tapped and plugged
the holes.
The two heads were from two different engines. One had apparently been
prepped to go on a small block 400 at some time during the last 35 years.
I was still searching or correct 3-7/8" bore head gaskets. The only ones I
could find were steel shims, which would leak around the 400 steam holes since
they had no raised bosses in that area. I went ahead and tapped and plugged
the holes.
 Smear epoxy on the threads, screw in, saw off. I resurfaced the heads
*again*, this time on the big belt sander machine, for a nice smooth surface.
Smear epoxy on the threads, screw in, saw off. I resurfaced the heads
*again*, this time on the big belt sander machine, for a nice smooth surface.
 I sprayed paint into the head bolt holes, bolted the heads on, and the paint
showed where the bolts were rubbing against the sides of their holes, which
were now angled, too.
I sprayed paint into the head bolt holes, bolted the heads on, and the paint
showed where the bolts were rubbing against the sides of their holes, which
were now angled, too.
 I used the die grinder to kiss the bottoms of the bolt holes - the .030"
offset dowels moved the tops forward so there were no problems - and then
recut all the bolt faces square on the milling machine with a 3/4" cutter.
You can see where I deburred the corners of the outer row with the die
grinder.
I used the die grinder to kiss the bottoms of the bolt holes - the .030"
offset dowels moved the tops forward so there were no problems - and then
recut all the bolt faces square on the milling machine with a 3/4" cutter.
You can see where I deburred the corners of the outer row with the die
grinder.
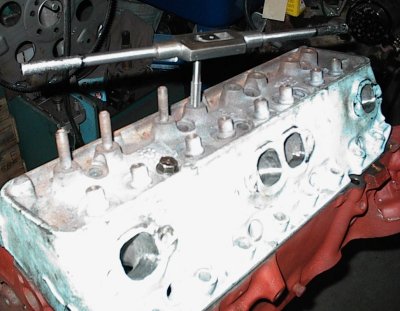
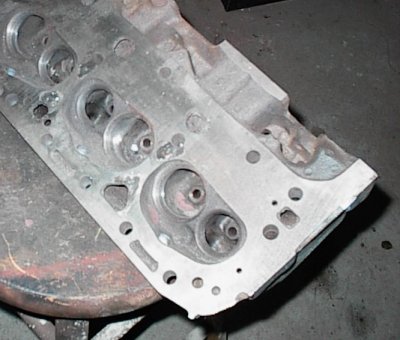
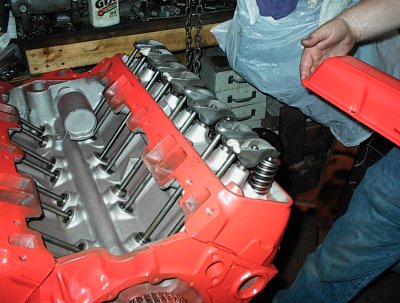
 A finished head, stuffed full of new stainless steel valves. It would have
been cheaper to buy some new aluminum heads, but they wouldn't have been
correct at the shows. Extensive machine work on collectible iron castings is
not cost-effective.
A finished head, stuffed full of new stainless steel valves. It would have
been cheaper to buy some new aluminum heads, but they wouldn't have been
correct at the shows. Extensive machine work on collectible iron castings is
not cost-effective.
 The lifters and cam were used, but only had a couple hundred miles on them. I
took the lifters apart, cleaned them, and put them back together.
The lifters and cam were used, but only had a couple hundred miles on them. I
took the lifters apart, cleaned them, and put them back together.
 The camshaft we used as an Isky 280 Mega-Cam. I don't know how old the
profile is, but I know they made them in the early '70s. Very steep ramps,
tight lobe center, shortish duration.
The camshaft we used as an Isky 280 Mega-Cam. I don't know how old the
profile is, but I know they made them in the early '70s. Very steep ramps,
tight lobe center, shortish duration.
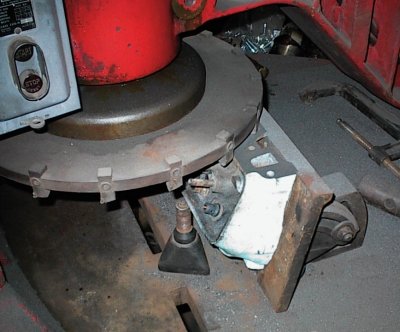
We've just found top dead center and removed the piston stop.
 The cam came in straight up, as it was supposed to. I advanced it two
degrees, using the extra slot in the crank sprocket.
The cam came in straight up, as it was supposed to. I advanced it two
degrees, using the extra slot in the crank sprocket.
 Brand new GM dipstick tube, already painted. There's also a new tube down
inside the oil pan; lots of times those get damaged and discarded during
rebuilds.
Brand new GM dipstick tube, already painted. There's also a new tube down
inside the oil pan; lots of times those get damaged and discarded during
rebuilds.
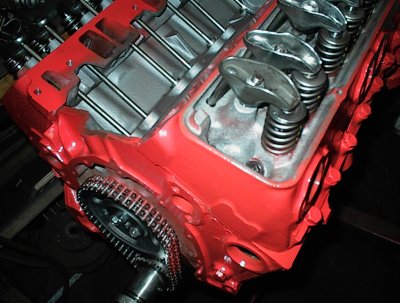
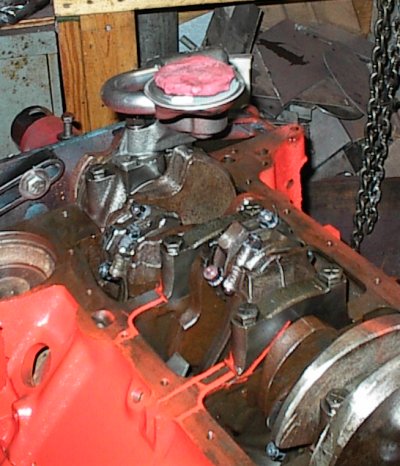
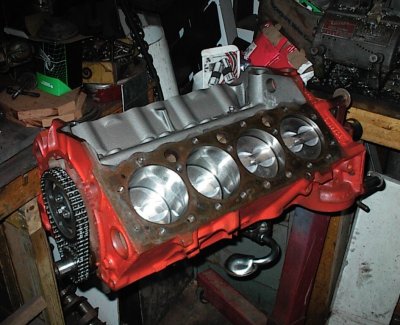 Trophy shot of the short block. Looks a lot better now, doesn't it? New
Cloyes timing chain, flat top 307 cast pistons, ARP rod bolts on rebuilt small
journal rods, and lots of cleaning and de-rusting, tap all the bolt holes,
clean, clean, clean...
Trophy shot of the short block. Looks a lot better now, doesn't it? New
Cloyes timing chain, flat top 307 cast pistons, ARP rod bolts on rebuilt small
journal rods, and lots of cleaning and de-rusting, tap all the bolt holes,
clean, clean, clean...
The flat top pistons and 57cc chambers gave us 9.4:1 compression. It would
have been considerably higher, but the assembled height of the reciprocating
assembly was quite a bit short of the deck.
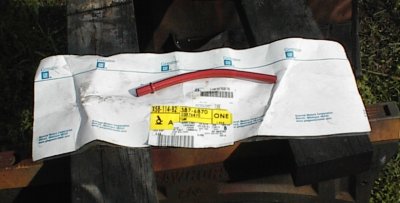
 Real GM steel shim head gasket. Bore size 3.93". These are the only 283-bore
gaskets available; other than a few 4.080" or so racing gaskets, the rest are
4.155" or 4.200" for universal fit, 305 to .060-over 400. The GM gaskets come
with a sealer coat already installed. Clamped thickness is .015".
Real GM steel shim head gasket. Bore size 3.93". These are the only 283-bore
gaskets available; other than a few 4.080" or so racing gaskets, the rest are
4.155" or 4.200" for universal fit, 305 to .060-over 400. The GM gaskets come
with a sealer coat already installed. Clamped thickness is .015".
Chevy has many different numbers for 283 and 307 gaskets, but no descriptions
on what might be different between them. Mark Possinger at Gwatney Chevrolet
spent a lot of time digging up part numbers, ordering gaskets in, and sending
them back after we measured them. Thanks, Mark!
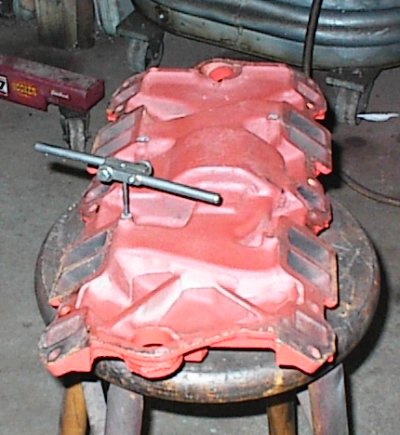
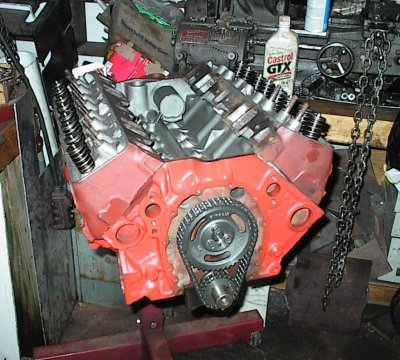 Danged near finished now. There's been a lot of work behind the scenes to get
us this far - as you've seen above, everything needed to be massaged just a
bit before it would fit.
Danged near finished now. There's been a lot of work behind the scenes to get
us this far - as you've seen above, everything needed to be massaged just a
bit before it would fit.
The heads are still in primer here. Primer is good stuff on engines; it keeps
the paint from flaking or getting blown off at the car wash.
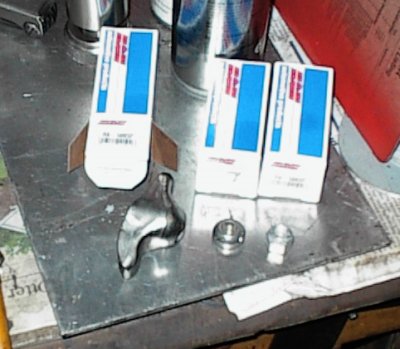 Brand new Elgin 1.6 rockers, which would have given us .499" lift. Even came
with new adjusting nuts!
Brand new Elgin 1.6 rockers, which would have given us .499" lift. Even came
with new adjusting nuts!
 1.6 rockers are shorter on the intake side to change their ratio. I had run
into problems with 1.6 rockers hitting the inside of the pushrod slot before,
so I had carefully extended the slots with the die grinder while I was
prepping the heads. I thought I'd ground plenty...
1.6 rockers are shorter on the intake side to change their ratio. I had run
into problems with 1.6 rockers hitting the inside of the pushrod slot before,
so I had carefully extended the slots with the die grinder while I was
prepping the heads. I thought I'd ground plenty...
I would have, except we set the heads .030" closer to the intake with the
offset dowels. "Oh, no, not another learning experience!" Several pushrods
rubbed the bottoms of the slots. We put 1.5 rockers on it, and the pushrods
wound up in the middles of the slots, right where they were supposed to be.
Faced with a deadline to get the engine done, we decided to just use the 1.5s.
 Pushrods are in and valves adjusted.
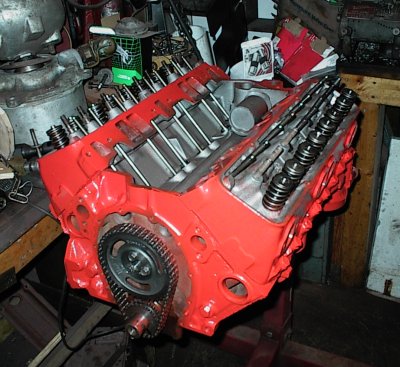
A little more Chevrolet Orange engine paint, and another trophy shot. You're lucky you don't have to page through a dozen trophy shots about now...
Tommy bitched piteously about orange overspray on the timing chain. I ignored
him.
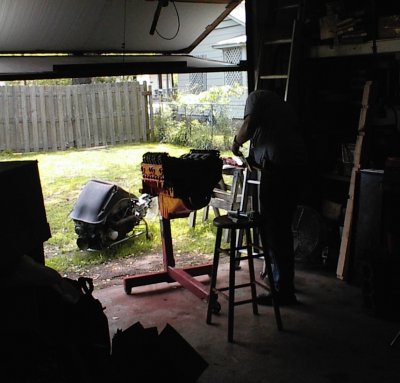
 Sometimes we worked really really fast...
 ...sometimes we didn't.
Object on newspaper to right is de-ratted
and painted harmonic balancer, ready for installation as soon as the paint
dries.
 We put clay on the rockers and turned the engine with the valve covers in
place. There was plenty of clearance, even at .465" lift. I was expecting to
have to double or triple gaskets to get clearance, not that I'm complaining.
We put clay on the rockers and turned the engine with the valve covers in
place. There was plenty of clearance, even at .465" lift. I was expecting to
have to double or triple gaskets to get clearance, not that I'm complaining.
 Tommy had located a deceased 307 truck engine, which yielded its oil pan,
timing cover, and assorted other bits. More cleaning...
Tommy had located a deceased 307 truck engine, which yielded its oil pan,
timing cover, and assorted other bits. More cleaning...
 Clay shows the pickup to pan clearance. That's a '90 Chevy truck pickup with
the 3/4" diameter tube. Pump is a Melling M55HV. You have to adjust things
up and down with the BFH to make it all fit correctly.
Clay shows the pickup to pan clearance. That's a '90 Chevy truck pickup with
the 3/4" diameter tube. Pump is a Melling M55HV. You have to adjust things
up and down with the BFH to make it all fit correctly.
 A little more Chevrolet Orange here and there...
 That's an old-type canister oil filter. People hated them because they were
messy and the spin-on filters were clean and easy. However, the canister
element is twice as large as the standard spin-on, and you just lift it out,
cut the cardboard ends with your pocket knife, and roll it out to examine its
entrails if you want to see what's in there, as opposed to trying to chop open
a steel cased spin-on filter. Chevy left the threaded bolt hole for the
canister filter for a long time; I've seen roller 350s with it.
That's an old-type canister oil filter. People hated them because they were
messy and the spin-on filters were clean and easy. However, the canister
element is twice as large as the standard spin-on, and you just lift it out,
cut the cardboard ends with your pocket knife, and roll it out to examine its
entrails if you want to see what's in there, as opposed to trying to chop open
a steel cased spin-on filter. Chevy left the threaded bolt hole for the
canister filter for a long time; I've seen roller 350s with it.
Black is the correct color. There's supposed to be a big "AC" sticker; Tommy
will find one later.
 I chiseled the rivets out of the intake shield so I could get underneath and
chisel off the carbon buildup. I don't trust re-using the rivets, so I tapped
the holes for #10 machine screws.
I chiseled the rivets out of the intake shield so I could get underneath and
chisel off the carbon buildup. I don't trust re-using the rivets, so I tapped
the holes for #10 machine screws.
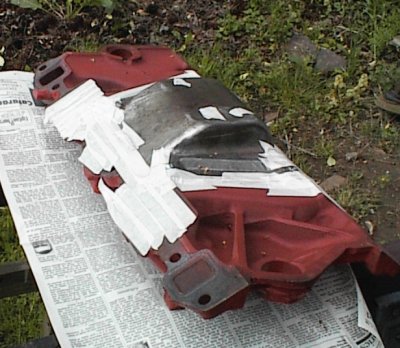
This is a rare '68 model Quadrajet intake with the front oil fill. The
correct four barrel carburetor for a '65 SS was the WCFB, which isn't a
performance item by any means. Some years ago David Vizard found the stock
Quadrajet intake performed *very* well on a dyno test he did for Popular Hot
Rodding, and we didn't care about a few pounds one way or the other on a 4200
pound car, so we went with that. The air cleaner mostly hides the incorrect
Quadrajet, which will flow more than enough air for a 311 inch engine.
 The heat shield hit the heads and wouldn't let the intake sit completely down
when no gaskets were used. I couldn't quite tell when there were gaskets. So
I taped off all the openings, did a little clearance grinding, and cleaned it
back up. Vacuum leaks suck.
The heat shield hit the heads and wouldn't let the intake sit completely down
when no gaskets were used. I couldn't quite tell when there were gaskets. So
I taped off all the openings, did a little clearance grinding, and cleaned it
back up. Vacuum leaks suck.
 Almost there...
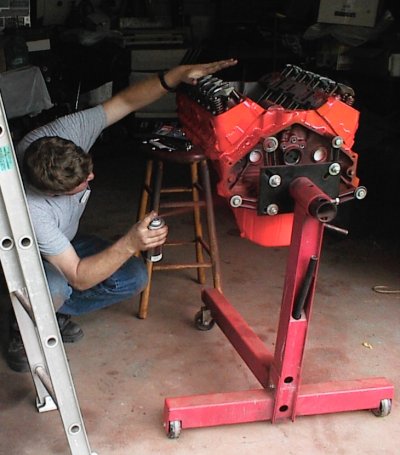
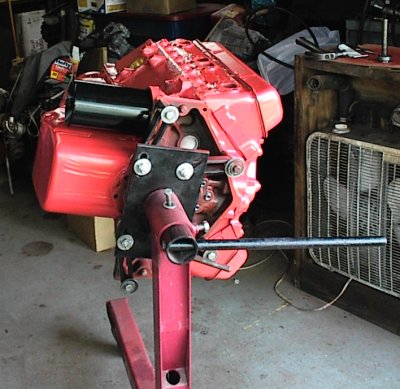
 And here we are on the run stand. We ran half a gallon of gas through it; it
just sat there and loped through the Dynomaxes, cool as a cucumber, running 70
PSI hot oil pressure.
And here we are on the run stand. We ran half a gallon of gas through it; it
just sat there and loped through the Dynomaxes, cool as a cucumber, running 70
PSI hot oil pressure.

     M A X I M U M     O V E R D R I V E     R A C I N G     E N G I N E S


                      283 Chevy stroker for Tommy Wilson


                     completed 04/20/03  (complete engine)


                             3.905 bore   (+.030)
                             3.250 stroke (+.250)


                            311 CID, 5103cc (5.1 L)


                         57   cc combustion chamber
                         10.3 cc .050 deck
                          3   cc .015 gasket
                          6   cc valve notches
                        --------
                         76.3 cc clearance volume

                          638 cc swept volume (3.905 x 3.250)
           638 + 76.3 = 714.3 cc total volume

                        714.3 / 76.3 = 9.36:1 CR


     warranty:  if it breaks, you get to keep all the pieces you can find

COMPONENTS ---------------------------------------------------------------

heads:
        Chevrolet 461 closed chamber castings, "camel hump", no bolt holes
        angle milled .100, intake faces recut
        fine surface from belt sander for steel shim gaskets
        SSI 2.02/1.60 1 piece stainless steel valves, single groove
        fully ported exhaust, reworked intake
        LT-1 valve springs 120# 1.70 seat, 300# 1.25 open, 1.15" coil bind
        1.70" installed height
        chase all threaded holes
        three angle valve job, 30-45-60 degrees
        valve job vacuum checked
        bronze guide liners
        checked valve to cylinder wall clearance, OK (.800 lift)
        checked deck to intake angles on heads, OK (do not use end gaskets)
        rocker areas painted cast iron
        milled head bolt seats square with decks
        clearanced head bolt holes for bolts (due to angle mill)
        existing 400 steam holes in one head plugged
        cut guide bosses down .060"
        .540" clearance between seals and retainers (.496 lift)
        retainers only, no steel umbrellas
        rubber umbrella seals on valve stems

block:
        '66 283, .030 over
        .030 offset head dowels
        cam bearings Dura-Bond CH-4, 283, extra-wide rear bearing
        chase all threaded holes
        brass freeze plugs
        valley painted cast iron
        new lower dipstick tube

crank:
        327 3.25" small journal, forged steel
        no balancer bolt hole
        mains Clevite 77 .020
        rod journals, #1 .010, #2 .010, #3 .030, #4 .010
        checked counterweight to block clearance, ground crank slightly
        pistons at BDC: 1)      3.30            2)      3.30
                        3)      3.30            4)      3.305
                        5)      3.315           6)      3.31
                        7)      3.30            8)      3.30

pistons:
        P560-030 Badger pistons, 307 + .030, flat top, four reliefs
        fitted at .002-.0025"

rings:
        H660 Hastings .030-over moly 283 rings
        gaps .020, .020, .030 all


rods:
        283 small journal forgings
        resized
        new ARP 11/32" bolts     pn134-6001
        stretched to .006-.0064" with ARP moly lube
        rod bearings Clevite 77 CB-745-P .010, .030
        side clearance:
                #1      .013"
                #2      .016"
                #3      .012"
                #4      .012"
        stack height:
                1)     -.060"           2)     -.063"
                3)     -.048"           4)     -.062"
                5)     -.037"           6)     -.035"
                7)     -.048"           8)     -.048"

cam:
        Iskenderian hydraulic 270 Mega-Cam #201271
        221/221 @.050, .465/.465 lift (w/1.5 rockers) .511/.511 (1.6)  108 LC

timing set:
        C302X Cloyes multikey double roller
        installed on 2 degree advanced slot

lifters:
        Crane anti-pump-up hydraulic

oiling:
        Melling M55HV oil pump
        '93 3/4" oil pickup tube and top cover
        1966 Chevrolet canister oil filter

balance:
        396     rod big end
        396     rod big end
        45      rod bearing
        45      rod bearing
        746     piston and pin
        47      rings
        174     rod pin end
       -----
       1849 grams bobweight

        800 RPM setup speed,  650 RPM balance speed

       .015 oz-in front imbalance, .020 oz-in rear imbalance

misc:
        20-25 ft-lb turning torque, short block, no cam
        1966-1968 Chevrolet cast iron spreadbore with front oil fill
        custom-built JET QuadraJet, electric choke; JET 1-800-535-1161